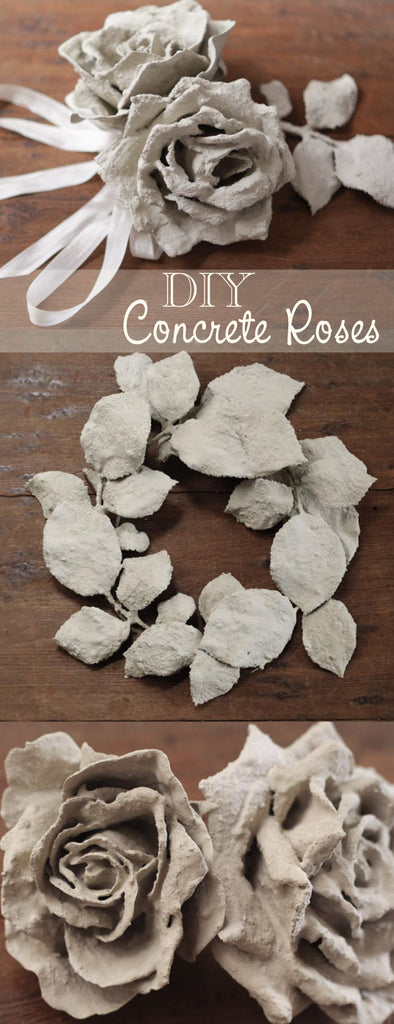
Tutorial: DIY Concrete Flowers
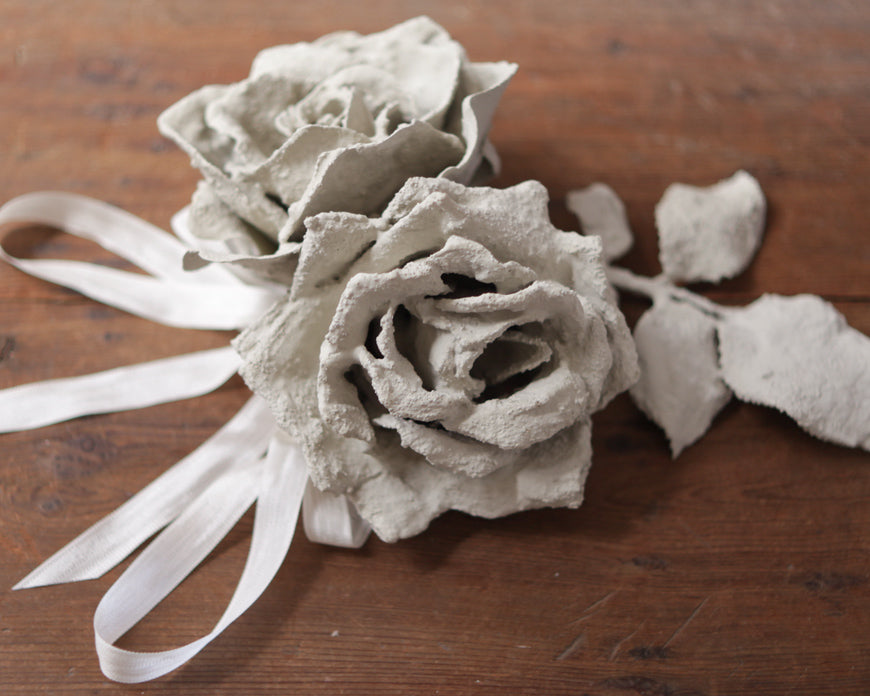
This tutorial is from a few years ago, but it's a goodie! These concrete flowers are inexpensive to make, and look stunning when they're done. They look like carved stone, and are really elegant. You can use them to make a wall hanging, or a sculpture. I used mine as a garden accent, and nestled them into my potted plants. It's a pretty messy project, and is a good one to do outdoors for easier cleanup.
As Amazon Associates we earn from qualifying purchases.
Supplies:
- Cement mix - I picked this particular brand because it sets quickly and comes in a small box
- Old paintbrush that can be ruined
- Thrift store flowers - not too fluffy, and something with structure, like roses.
- Wire - I used 16 gauge.
- Hot glue
- 3 or more disposable containers - plastic cups work well. I use the bottom halves of milk cartons
- Popsicle stick or something disposable to use for mixing cement
- Aluminum foil

Step 1: Cover your work area with aluminum foil to make cleanup easy. Pull off the stem that came on your flower. Replace the stem with a length of heavy wire, and hot glue it in place. Step 2: Mix your cement. Use roughly ⅓ cup of water with 1 cup of cement, and mix with a wooden stick. You’re looking for the consistency of melted ice cream. Not too watery, but still runny enough to be able to pick it up with your paint brush.

Step 3: Use your paintbrush to begin coating petals toward the center of the flower. Get the front and back of the petals, and down into the center a bit. Don’t be too detailed with this - it’s just a base coat so that the next coat has something to grab onto. Don’t coat the outer petals yet, just focus on the center area. Step 4: Holding the flower by the stem, turn it upside down, and put a coat down around the stem (and calyx if your flower has one.) Again, don't coat the outer petals yet. Having just this center part done will give them support so they don't get floppy later on.

Step 5: Bend the wire stem into a hook and hang it up somewhere to dry with some foil beneath to catch any drips. I used the shower curtain rod in the bathroom. If you're working outside, a dowel supported by two chairs will do the trick. Let it hang there for about 30 minutes. It may not be totally dry, but just a little rigid is good enough to continue. Don't forget to wash out your brush while you wait. Step 6: Mix a new batch of cement. Go ahead now and coat the outer petals, being gentle with your previous work.

Step7: Flip the flower upside down and coat the underside again. Hang it up to dry. Step 8: So the whole flower should have a dry base coat now. Mix a new batch of cement and give the flower a total coating. Hang up to dry overnight. You can repeat this step if you choose - just get the flower as thick as you’d like it.

And here they are totally hardened:

Really pretty, right?! I also coated the leftover leaves to make a little wreath. To do this, use short segments of leaves, and give them extended wire stems before you coat them. This way, you can just wire them together from the back after they are hardened.
And here's a candle ring! Wouldn't that look just lovely with a pillar candle inside?

I hope you enjoyed this tutorial, and will try making some concrete flowers of your own. As always, if you love it, share it!

Pin Me!

