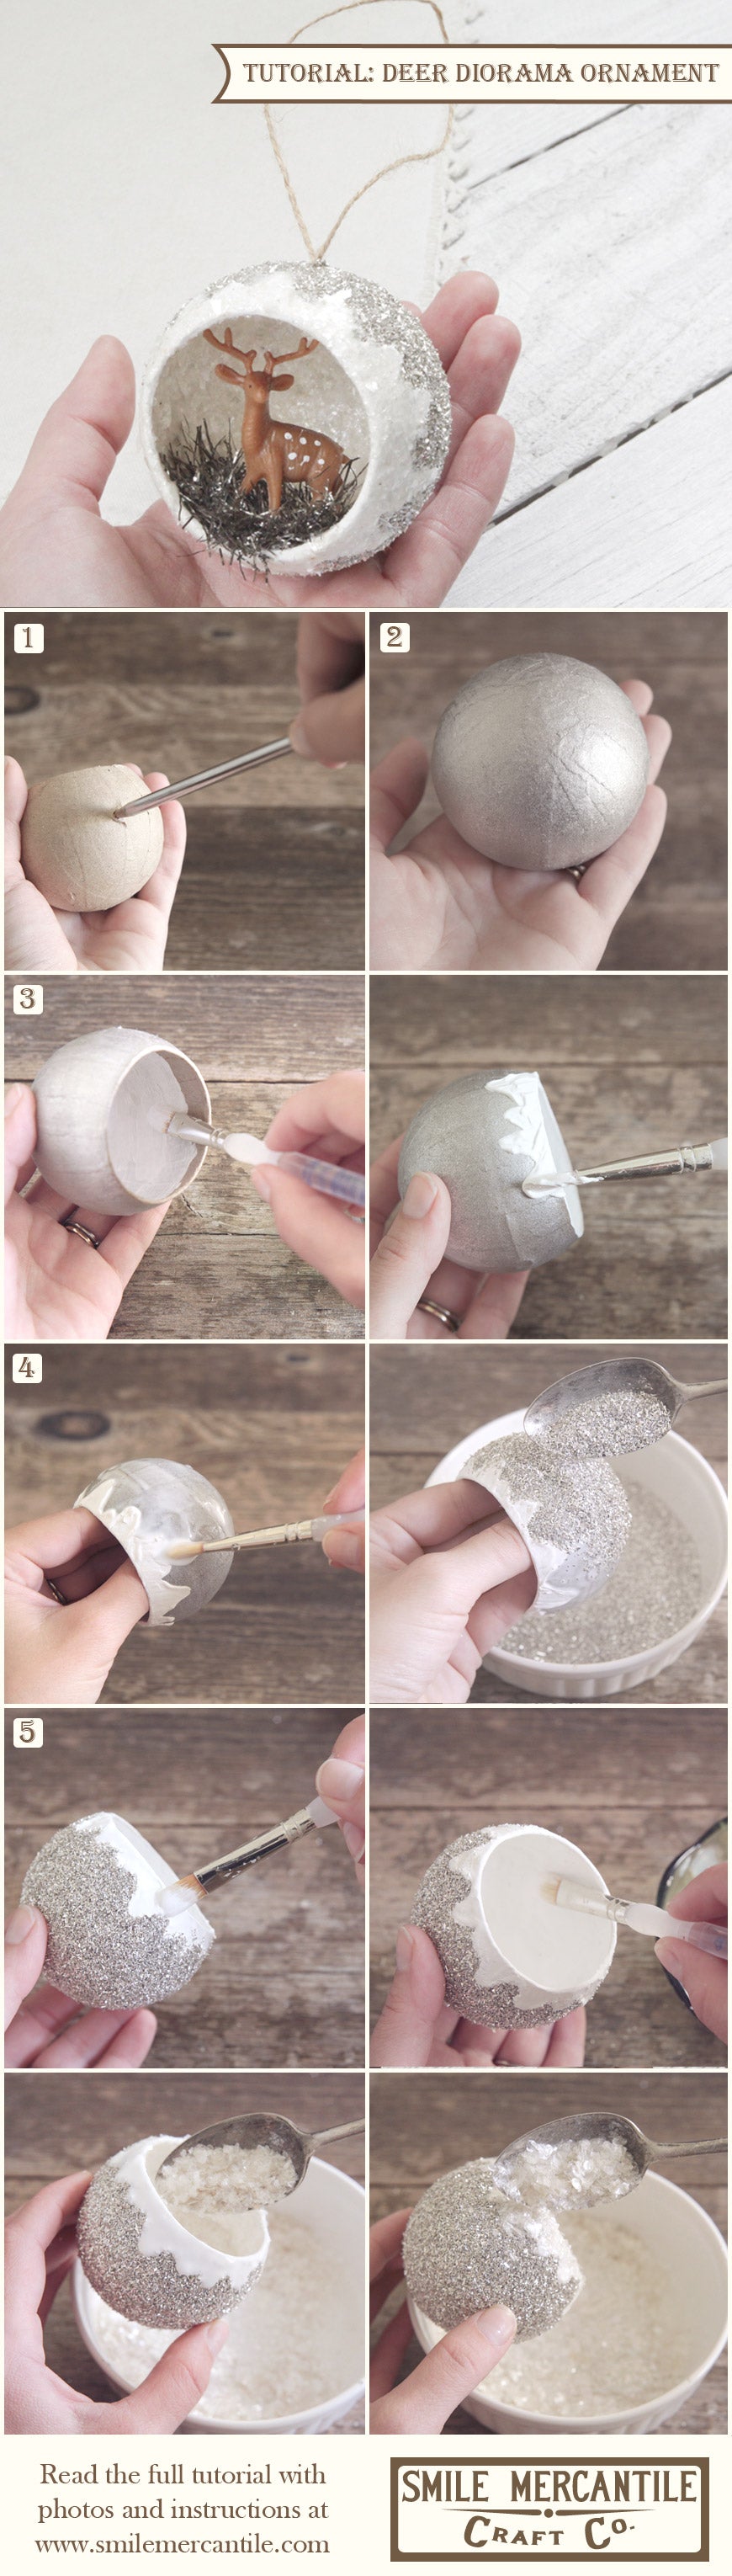
Tutorial: Deer Diorama Ornament
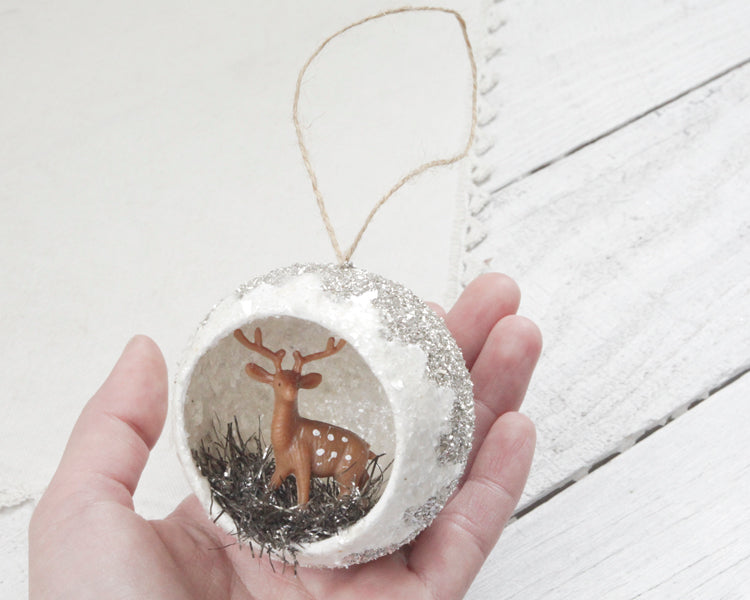
These vintage-inspired Christmas ornaments are just the sweetest little treasures! You can collect all kinds of miniatures to put inside and craft your little worlds. I make some with little spun cotton mushrooms, itty bitty bottle brush trees, and also tiny plastic deer, which I'll use for the tutorial. I sell some of these supplies here in the shop, including the plain diorama ball forms and the miniature deer.
Supplies:
- Diorama ball form
- miniature deer or other tiny objects
- tinsel trim
- silver paint
- white acrylic gesso (or regular white craft paint)
- white glue
- German glass glitter
- mica (or clear glitter)
- jute twine
- small piece of floral wire
- awl
- paint brush, bowls for paint and glitter, spoon
- hot glue gun, hot glue sticks.
Step 1: The diorama ball forms come with a little gold hanging loop that we won't use, so pull it off. Use your awl to widen the hole where the loop was. You need the hole to be just wide enough for your jute twine to fit through. These ball forms have a layer of hard plastic under the paper mache, so you may have to use some force to punch the hole all the way through.
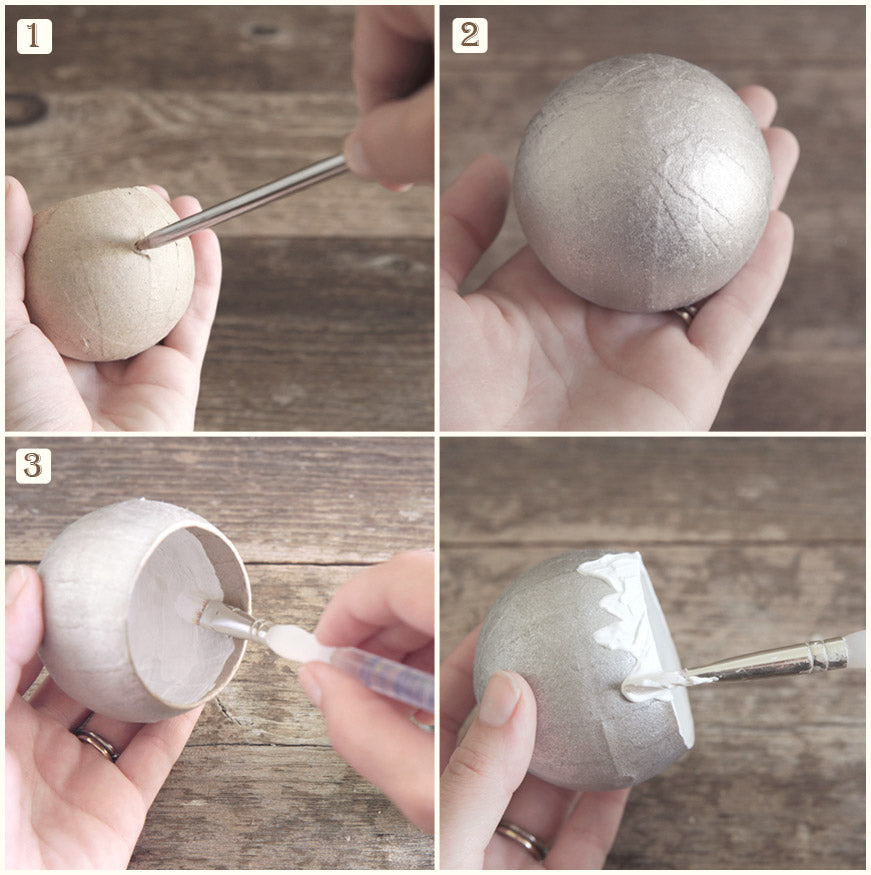
Step 2: If you are using a coarse glitter, like German glass glitter, I recommend painting the outside of the ball the same color so the brown paper doesn't show through. A fine-grained glitter should work just fine without painting the surface. I am using a really chunky silver glass glitter, so I've given the outside of the ornament a coat of silver paint.
Step 3: Paint the interior of the ornament white. It's nice to use an acrylic gesso because it's thicker than a regular craft paint, and will cover the brown paper in one coat. Then, use the side of your paintbrush to paint a snowy border around the opening of the ornament. Let the white paint dry completely.
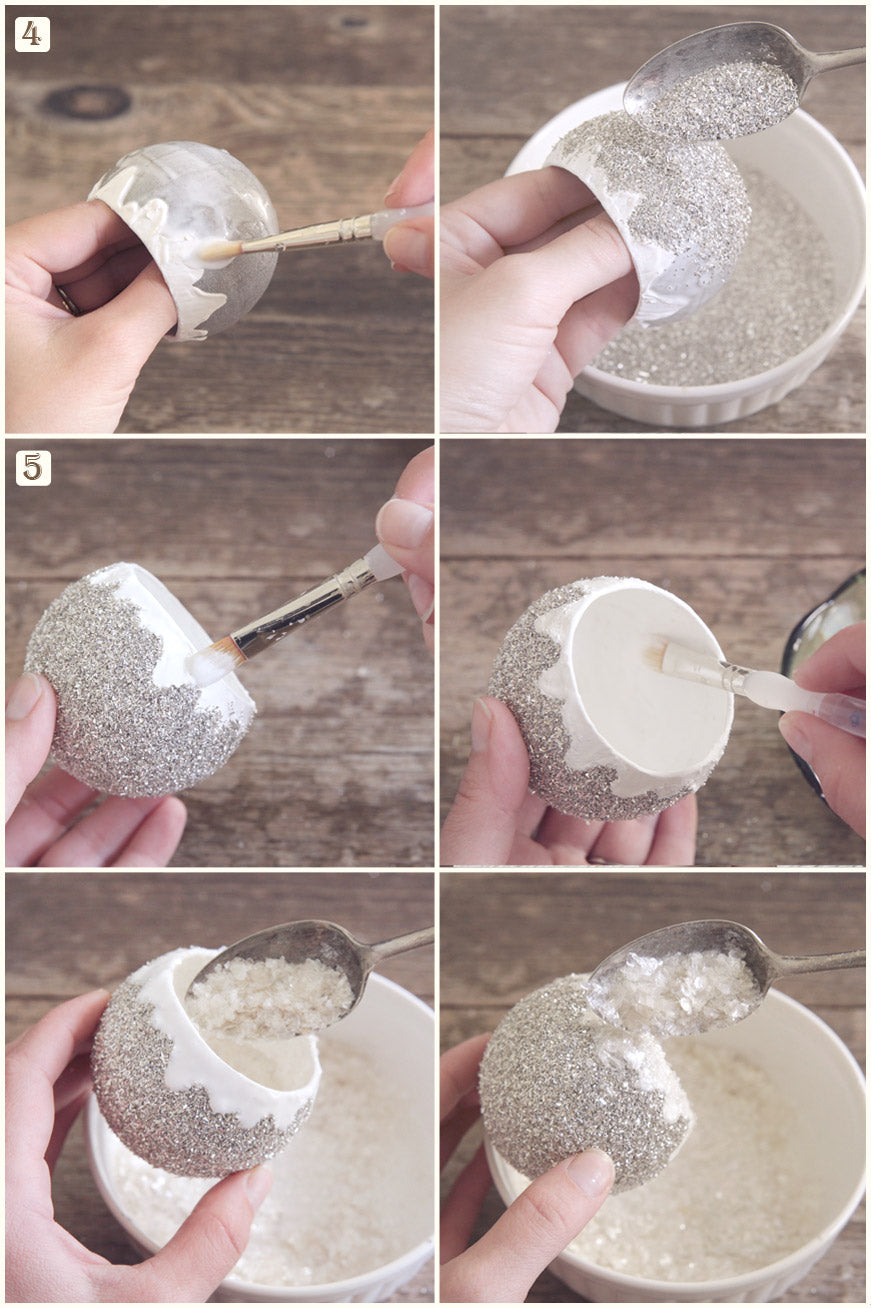
Step 4: Hold the ball from the inside, and coat the silver part with white glue. Try to avoid getting glue on the white border you've painted, but don't fret if it's not perfect. You can tidy the border afterward. Use a spoon to apply the glitter to the outside of the ornament. Shake off any excess, and let dry. If you are using German glass glitter you will want to seal it with something at this point so it doesn't tarnish too much over time. Spray sealants are stinky, but they do work well, and are easy to apply.You can also use an acrylic gel medium, which you would apply with a paint brush.
After the glitter coat is dry, you can go back and perfect the snowy border - touching up the edges with a little more white paint. Let the whole thing dry before moving on.
Step 5: Coat all of the white parts inside, and out, with white glue. Spoon in some mica and coat the interior of the ornament. Then coat the border on the outside. If you don't have mica, Snow Crystals glitter flakes work great. Let dry.
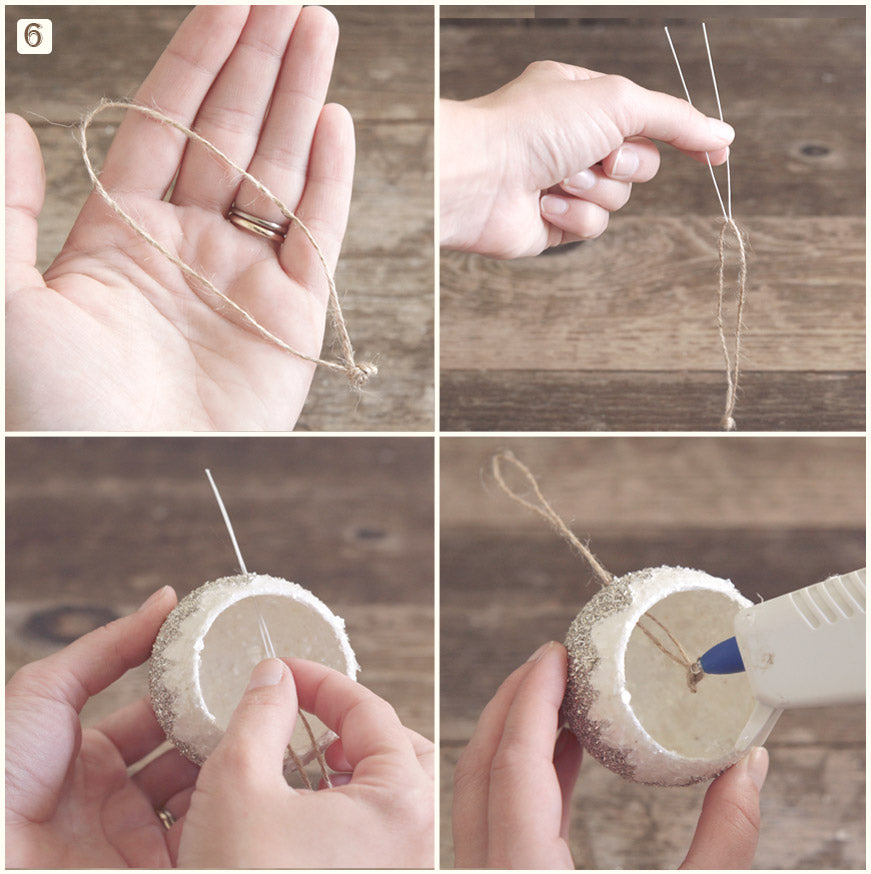
Step 6: Cut a length of jute twine and make a 4 inch loop. Knot the ends twice to make a fat knot, and trim the tails off close to the knot. Cut a small piece of floral wire, and bend it into a "V." You will use this as a needle to pull the loop through the hole in the ornament. Before pulling the loop all the way up, give the knot a dab of hot glue. Then, pull the loop all the way up, and press the knot against the ceiling of the ornament.
Yay! Now you get to have fun decorating the inside of the diorama.
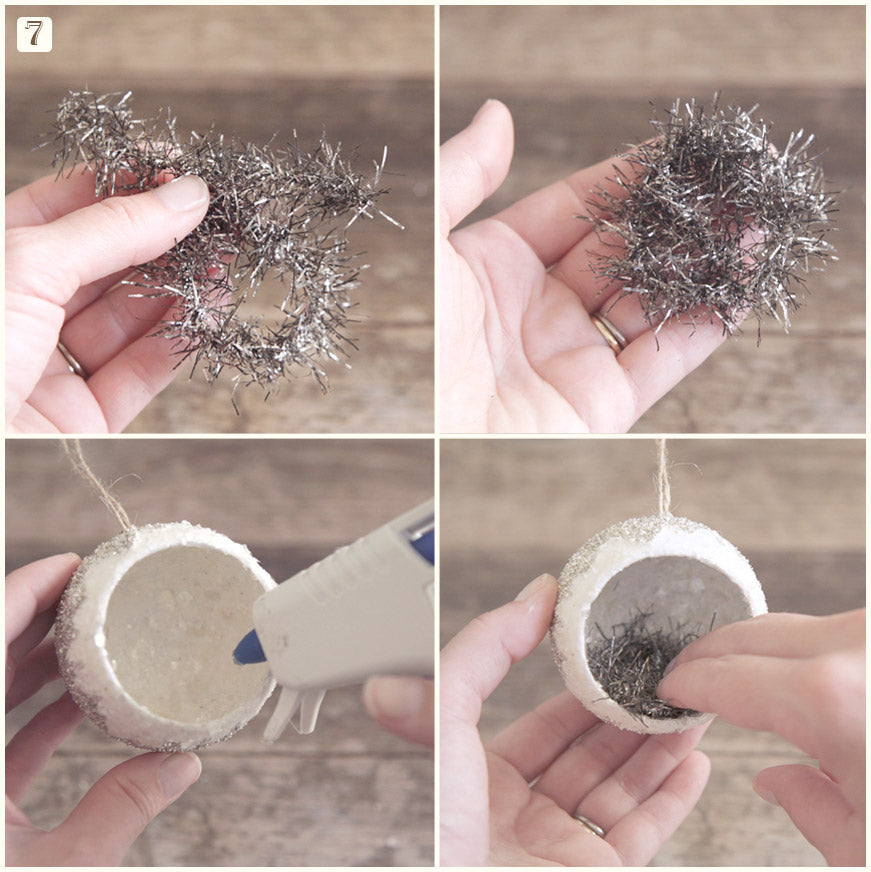
Step 7: Cut an 8 inch length of tinsel garland to make a little home for your deer. You can also use moss, excelsior, tissue paper or confetti. Tie the tinsel into a loose knot, like a pretzel. Use your glue gun to pump in a generous amount of glue. Press your tinsel into place.
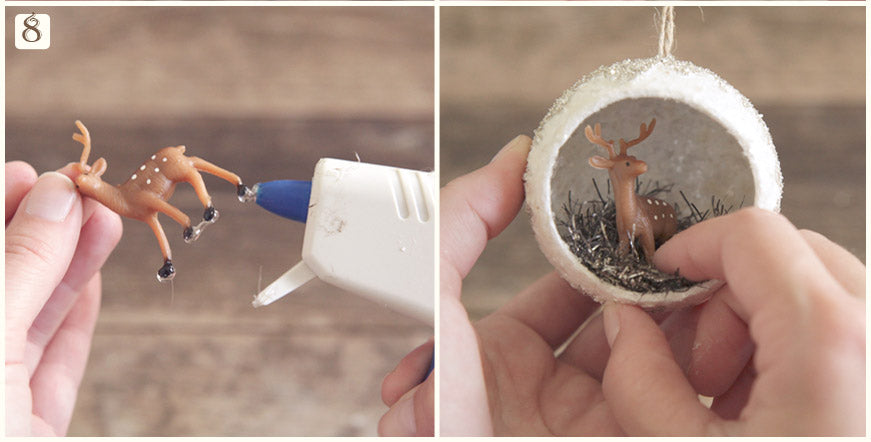
Step 8: Apply little blobs of glue to your deer's hooves, and position him where you want him to live. Press and hold until the glue is completely solid. You don't want your little guy going anywhere, so add a few more dots of glue to the tops of his feet, and press on a 1 inch piece of tinsel to secure him in place.
Ta-da! I bet you want to make a whole bunch more! Aren't these fun to make? Of course, if you don't want to go to the trouble of making one, I'd be thrilled to send you one that I've made myself!


