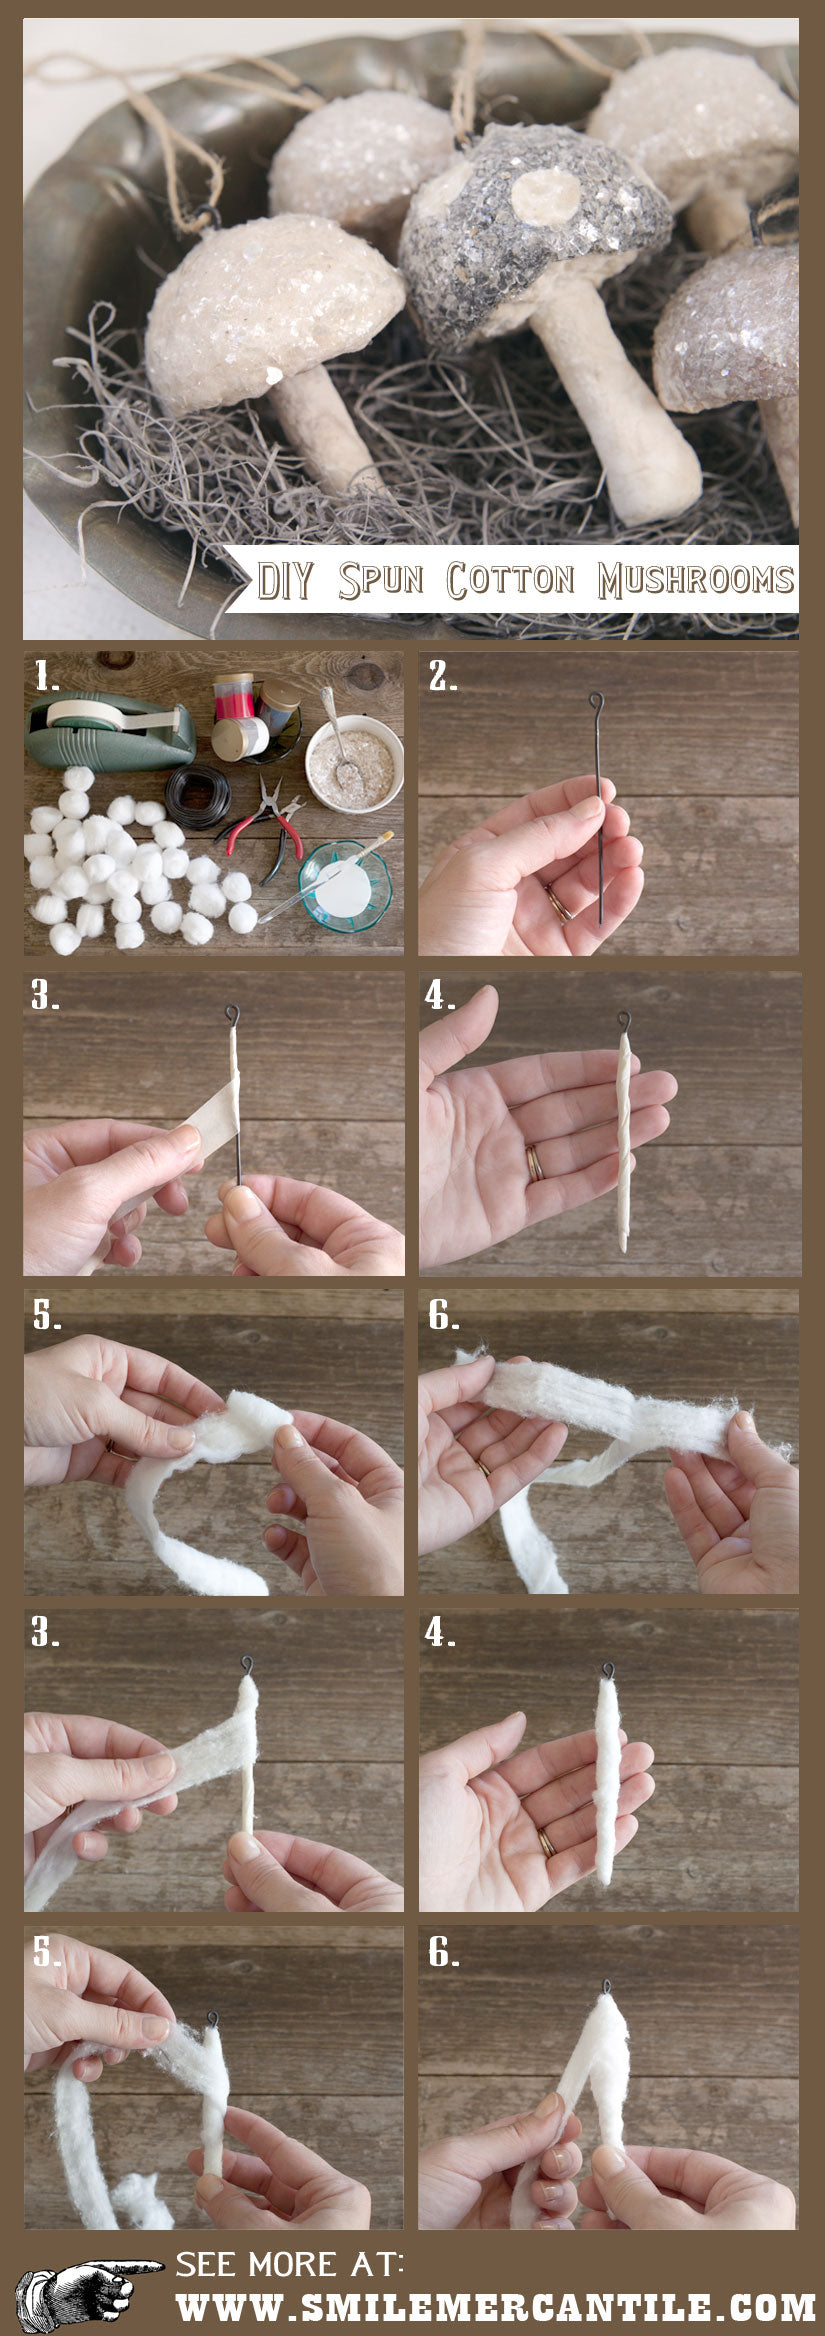
How to Make Spun Cotton Mushrooms
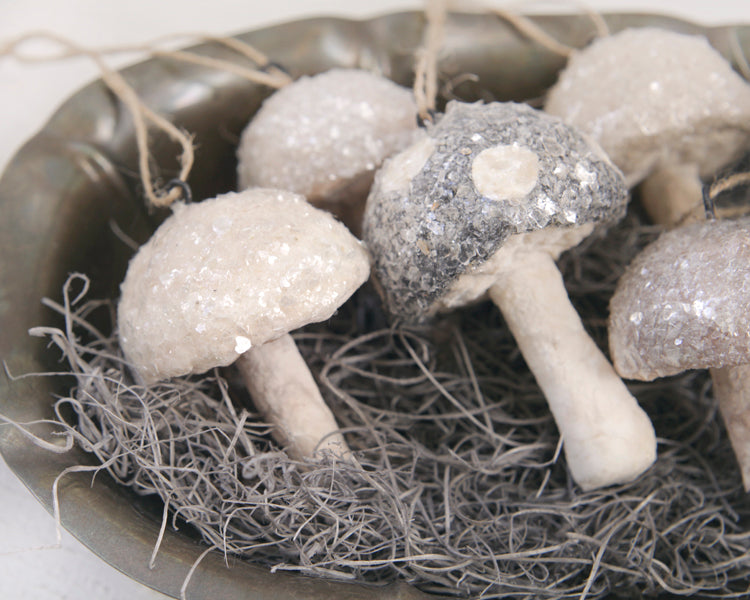
Here's a great way of making whimsical antique-style spun cotton mushrooms with loops for hanging up as ornaments. These would look adorable on a woodland Christmas tree, and make super unique gifts.
This hand-building technique takes some practice. The first few mushrooms are bound to look very "organic," but I think the individuality of each piece is something to be celebrated. You can make them look very natural, or very fantastical in their shapes and colors. The materials are simple and inexpensive, so you can make a whole bunch of them.
Supplies:
- 16 gauge iron wire
- wire snips
- needle nose pliers
- masking tape
- cotton balls (buy the biggest ones you can find, and make sure they are 100% cotton. My favorite ones are Swisspers Jumbo Plus from the drugstore,)
- white glue
- acrylic paints in white, brown and red
- paint brush
- mica or clear glitter
- bowls
Step 1: Cut a length of wire about 4 - 4 1/2 inches in length. Use your needle nose pliers to bend the very tip into a small loop. Brace the wire with your thumb, and bend the loop back slightly. This is so the loop is centered with the wire when you hang up the ornament.

Step 2: Wrap a long piece of masking tape around the wire. The tape will give the first layer of cotton something to grab onto, and will also keep the wire from rusting. Wrap a second layer of tape around the wire to thicken it up just a bit. Then, add a third layer of tape, this time with the sticky side facing out.

Step 3: Study your cotton balls to determine where the end is located, and unroll a handful of them. You can work with shorter lengths, but ideally, you want long, unbroken strips of cotton. Pull apart the strips lengthwise to make half-thickness strips.
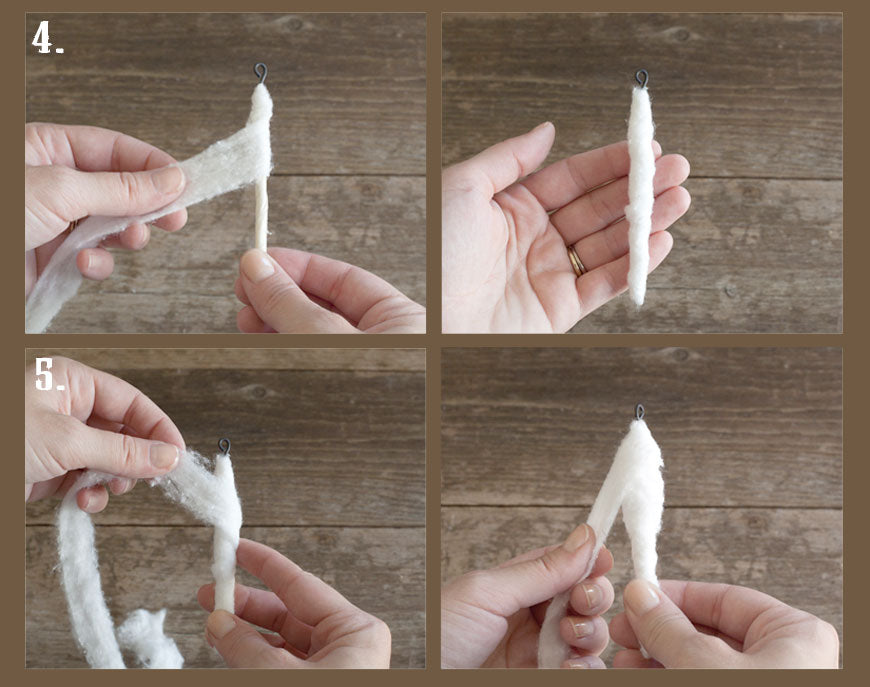
Step 4: Starting at the top, attach the end of a cotton strip, and begin slowly turning the wire. Keep the strip as taught as possible without tearing the cotton. The tighter you can wrap the wire, the better. When you reach the bottom, just continue turning, and wind the cotton strip back up toward the top of the wire. When the cotton strip runs out, just smooth it against the surface.
Step 5: Take a second piece of cotton, and start it this time at the center of the wire. Use your finger to hold it in place while you twist the wire, and wrap the cotton up toward the top. When you reach the top, just continue turning, and wind it back toward the center of the wire, covering your starting point. Give it an extra wrap right around the middle, and this will start building the cap shape of the mushroom.
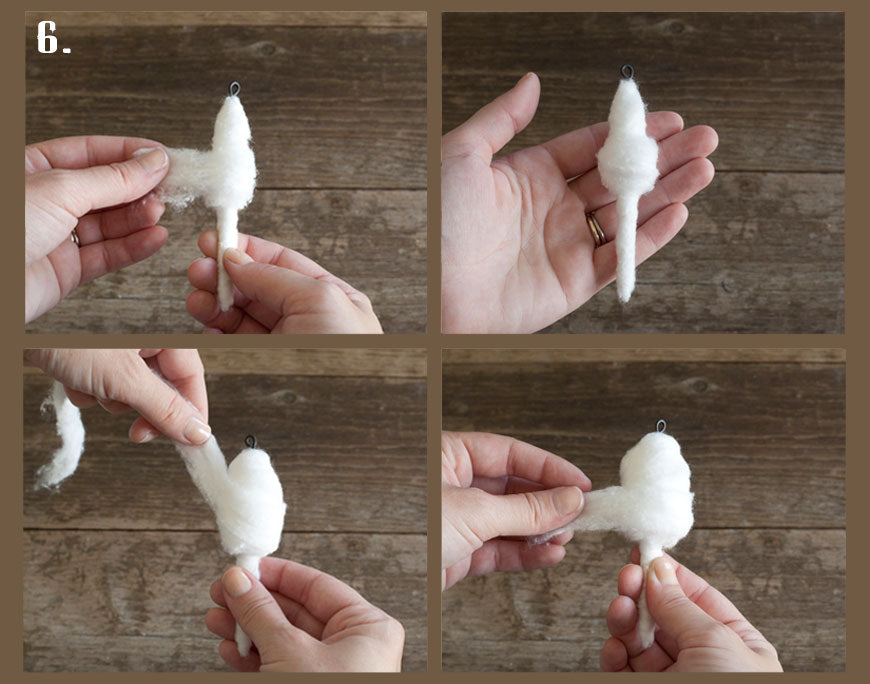
Step 6: Repeat this process, adding layers to the cap part of the mushroom, concentrating on adding thickness to the center portion. Keep going.
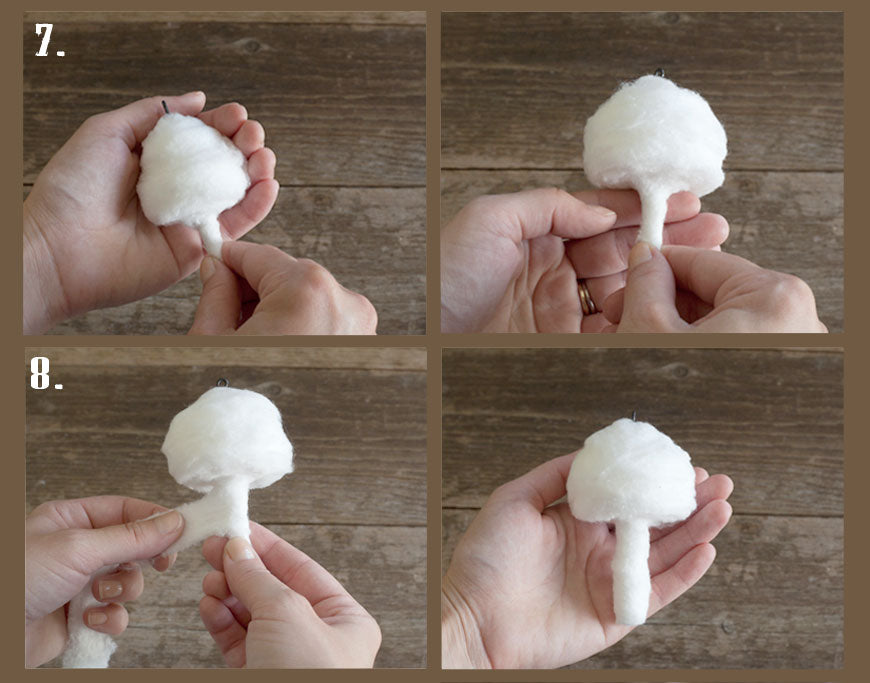
Step 7: Once you have 3 or more layers on the mushroom cap, lay it in your cupped hand, and spin it. This will help to flatten any lumpy areas, and compact the cotton a bit. Add layers until the cap is as full as you'd like it. You can really get creative at this stage and make all sorts of neat cap shapes. Place your finger under the cap and give it a spin to make that edge nice and sharp.
Step 8: When you feel the cap is the right shape, add a strip to the stem of the mushroom.
Step 9: Now it's time to brush on a hardener so that the mushroom will hold its shape, and will have a smooth surface to paint. In the old days, a cornstarch mixture would be used to harden the surface. I am using a watery glue mix instead - just about 1/3 glue, 2/3 water. Use a flat paint brush dipped in the mix to softly "pet" the surface with the flat part of the brush. Try to apply it in the same direction that you spun your cotton so that it stays nice and neat.
Once you have coated the cap of the mushroom, use a slick tool, like the back of a spoon, to gently smooth the surface. If you have any bumpy areas or wrinkles, you can dab on a bit more glue mixture, and softly press or pet it with the spoon to flatten them. When the cap is smooth, continue on to the stem. You can either hold the mushroom by the wire loop, or let the cap dry first so you can hold it by the cap while you work on the stem.
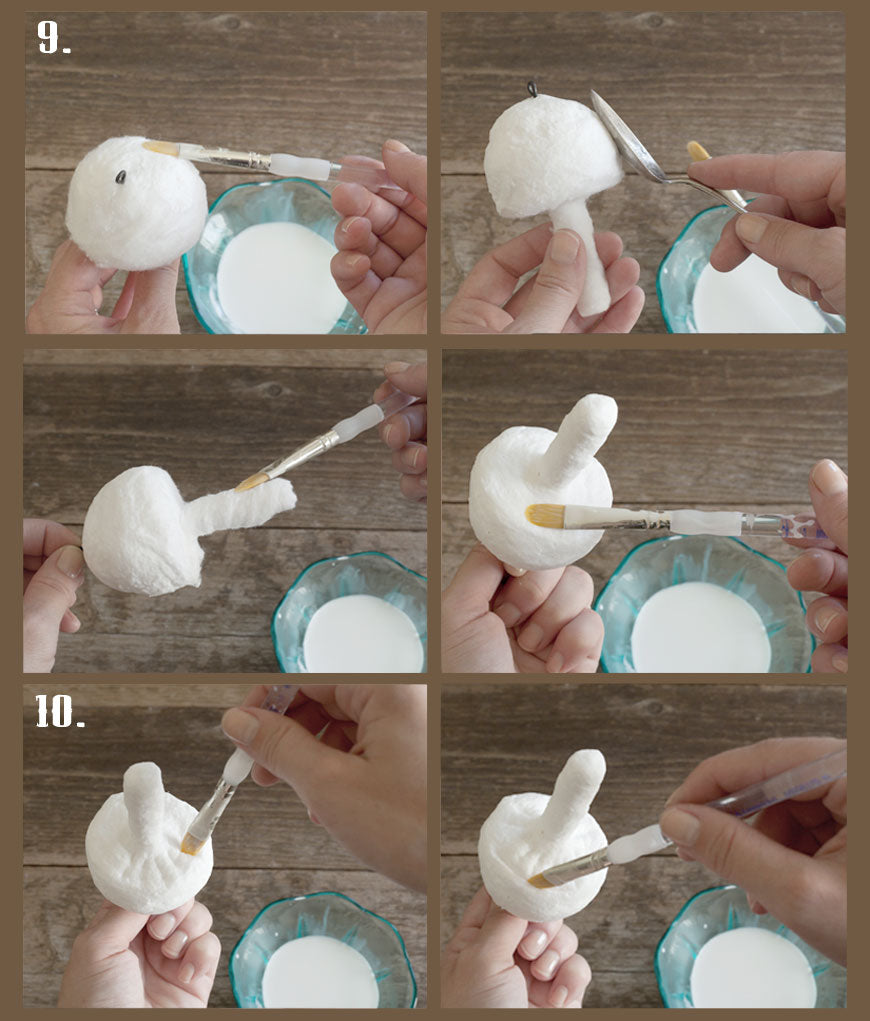
Step 10: Continue on to the underside of the cap. Use the very edge of the wet brush to "tap" little lines into the underside of the cap to represent the gills of the mushroom. Always use a tapping motion, rather than a drawing motion to avoid lifting any fibers. Finish by using the brush to tap a line all the way around the edge of the gills. Thread a piece of twine through the loop at the top, and hang it up somewhere to dry (a towel rack or shower curtain rod works great.) Let the mushroom dry completely before continuing. 24 - 48 hours is ideal.
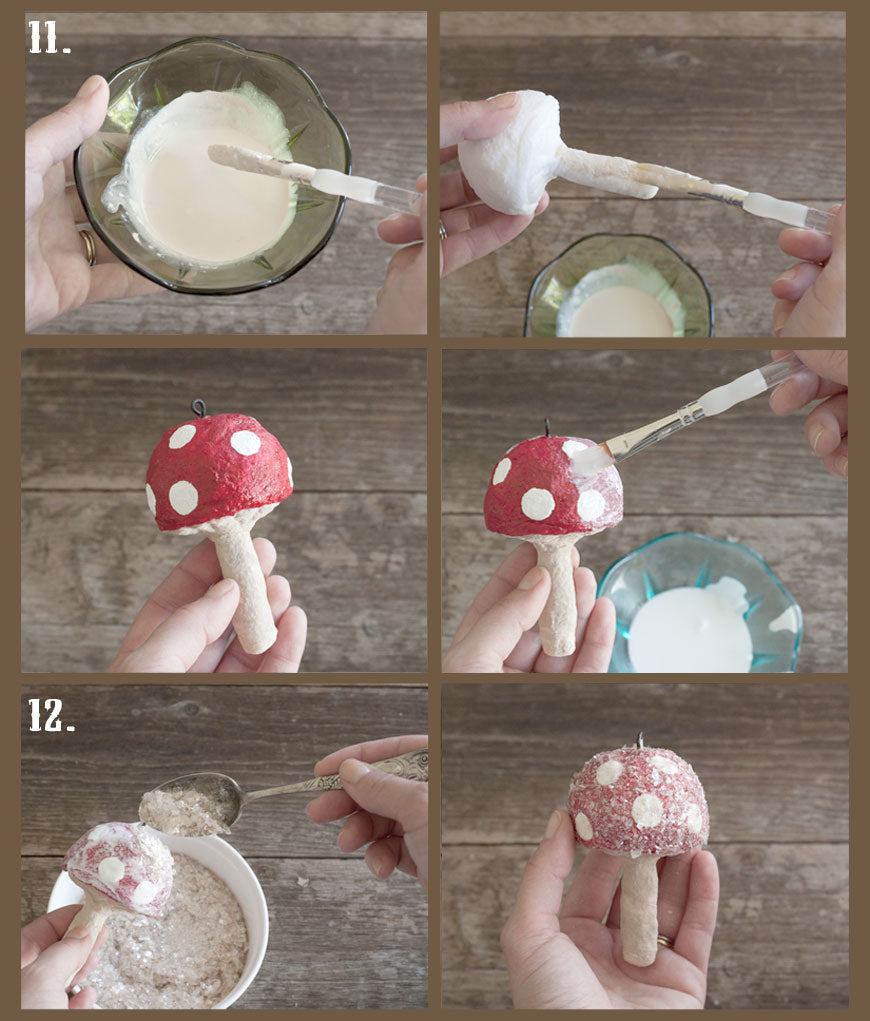
Step 11: When your mushroom is totally dry prepare your paint. Mix a very small amount of dark brown paint into some white paint (burnt umber is a nice brown to use). This will make a nice "mushroom" shade for the stem gills. Water it down to a milky consistency. Paint the stem and gills of the mushroom. Let dry.
You can paint the cap any color you like. Bright, natural, spotted, unspotted. I decided this partocular mushroom wanted to be red, so I used an undiluted red paint, and a bright white for the spots. You can also use watered-down colors for a more naturalistic or antique effect. Experiment - it's fun!
Step 12: For a fun, fairyland look, apply undiluted white glue to the entire cap, and douse with mica or clear glitter.
Voila! Now you can add a loop of ribbon or jute twine and hang it up to enjoy.
Here are some others that I made in neutral colors, which I think are super sweet: 


Don't these look like they were foraged out of a fairy garden? Hope you try it! Pin it:

