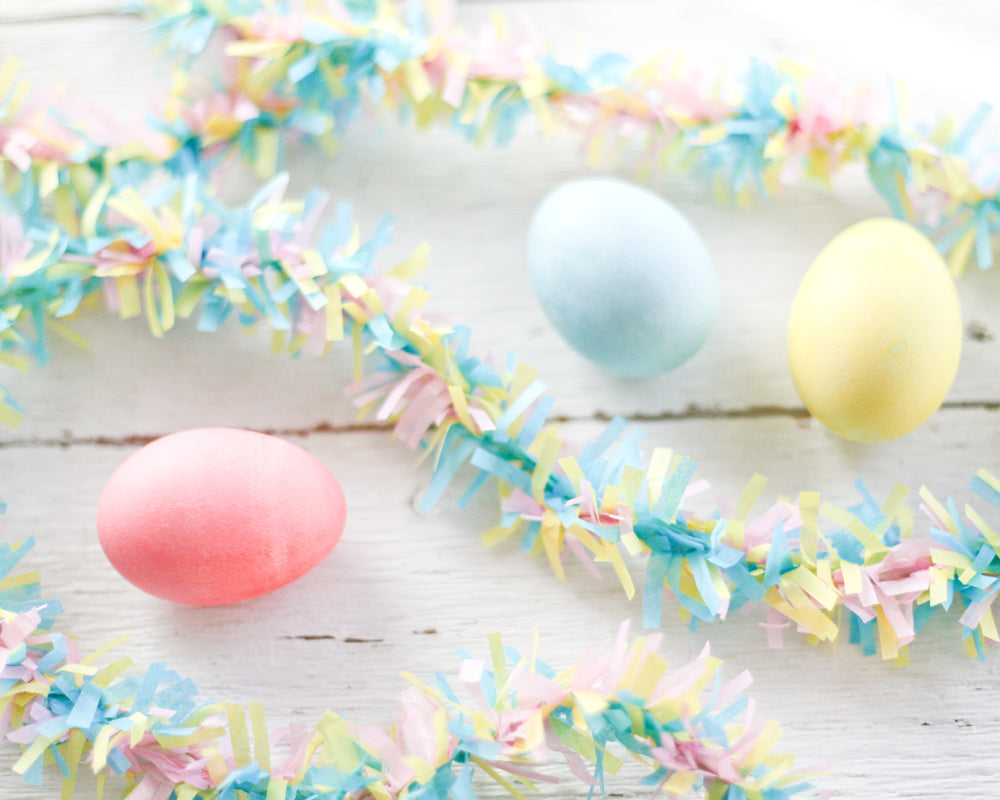
Vintage Craft: Tissue Paper Festooning! DIY Easter Garland Tutorial
 This tissue paper festooning is part of my vintage craft series: wonderful projects found in vintage craft books brought to life! I collect vintage craft books, and flipping through them I always say, "I want to make this!" With the mandatory stay-at-home order I have found all of this great 'extra time,' so I'm giving these projects a go.
I adapted this tissue paper garland from a vintage craft book called "Holiday Ornaments from Paper Scraps" by Vera Drehman, 1970. The original project called for a double layer of tissue paper with no inner cord. I tried that method as written, but it kept ripping as I twisted the paper fringe. This version is more complex with multiple layers and a string encased in the center. It's slightly harder to do, but the finished garland is well made, and will last from year to year for holiday celebrations. I'd like to try another one done with Christmas colors, or maybe one just done in neutral cream tissue.


What I love about this Easter garland is that it's just the sort of timeless craft that could have been made a hundred years ago with stuff from around the house. It takes minimal supplies- all inexpensive. I got the tissue at my local drugstore, but it would also work beautifully with used gift wrappings, or even old sewing patterns. The string is just regular cotton kitchen twine, but button thread would also do nicely.
Supplies:
- Tissue paper in three colors. (a single pack of each color will make multiple 9-foot garlands.)
- Approx. 10 ft simple string
- Scissors
- Glue Stick
Step 1:
Select one color to start with. Cut 4-6 layers of tissue into strips, 1 inch from a fold (so the strip will be 2 inches wide when unfolded.) I used a type of tissue paper that came folded in a package, so I just cut alongside the factory folds. If you are using a flat sheet type of tissue, you will need to fold it first, and then cut the strips. I have very sharp scissors, so I cut 6 layers at one time. If you have dull scissors, do it in batches so you get good clean cuts.
Step 2:
Take the long folded strips and fold in half to make them shorter. Hold with the folded edge at the top, and snip a 1/8" fringe along the entire length, stopping 1/4 inch from the fold. Once the whole length has been fringed, unfold completely and gently separate all layers.
Step 3:
Connect all of the segments end-to-end with a dab of glue from a glue stick. This will create a long length of fringe. Then, repeat all steps with the two other colors of tissue so you have three long lengths of fringe in all colors.
Step 4:
Cut a length of string, just a few inches longer than the fringe lengths. Tie a loop at one end and line it up with the end of one of the fringes. Working in foot-long sections, open and flatten the fringe, and then apply a line of glue along the center line of the fringe. Lay the string over the fringe with the loop extending past the end. Tap the string onto the glue just so that it sticks. Apply the next color of paper over the top, sandwiching the string in between the two colors. Press, and move on to the next section. At the end, form a loop with the remainder of the string and secure it between the layers of paper.
Step 5:
Again working in sections, glue the last color of paper fringe on top of the other two colors to create three layers of paper fringe.
Step 6:
Twist the fringe to create the fluffy garland: Hold the fringe in one hand, and use the other to pinch and twist the fringe 180 degrees every 1/4 inch. During this process, grasp the paper firmly with both hands so that each twist stays in place after you let go. Continue along until the entire garland is twisted.


