Tissue Paper Puffy Heart Valentine's Window Decoration - DIY Papercraft
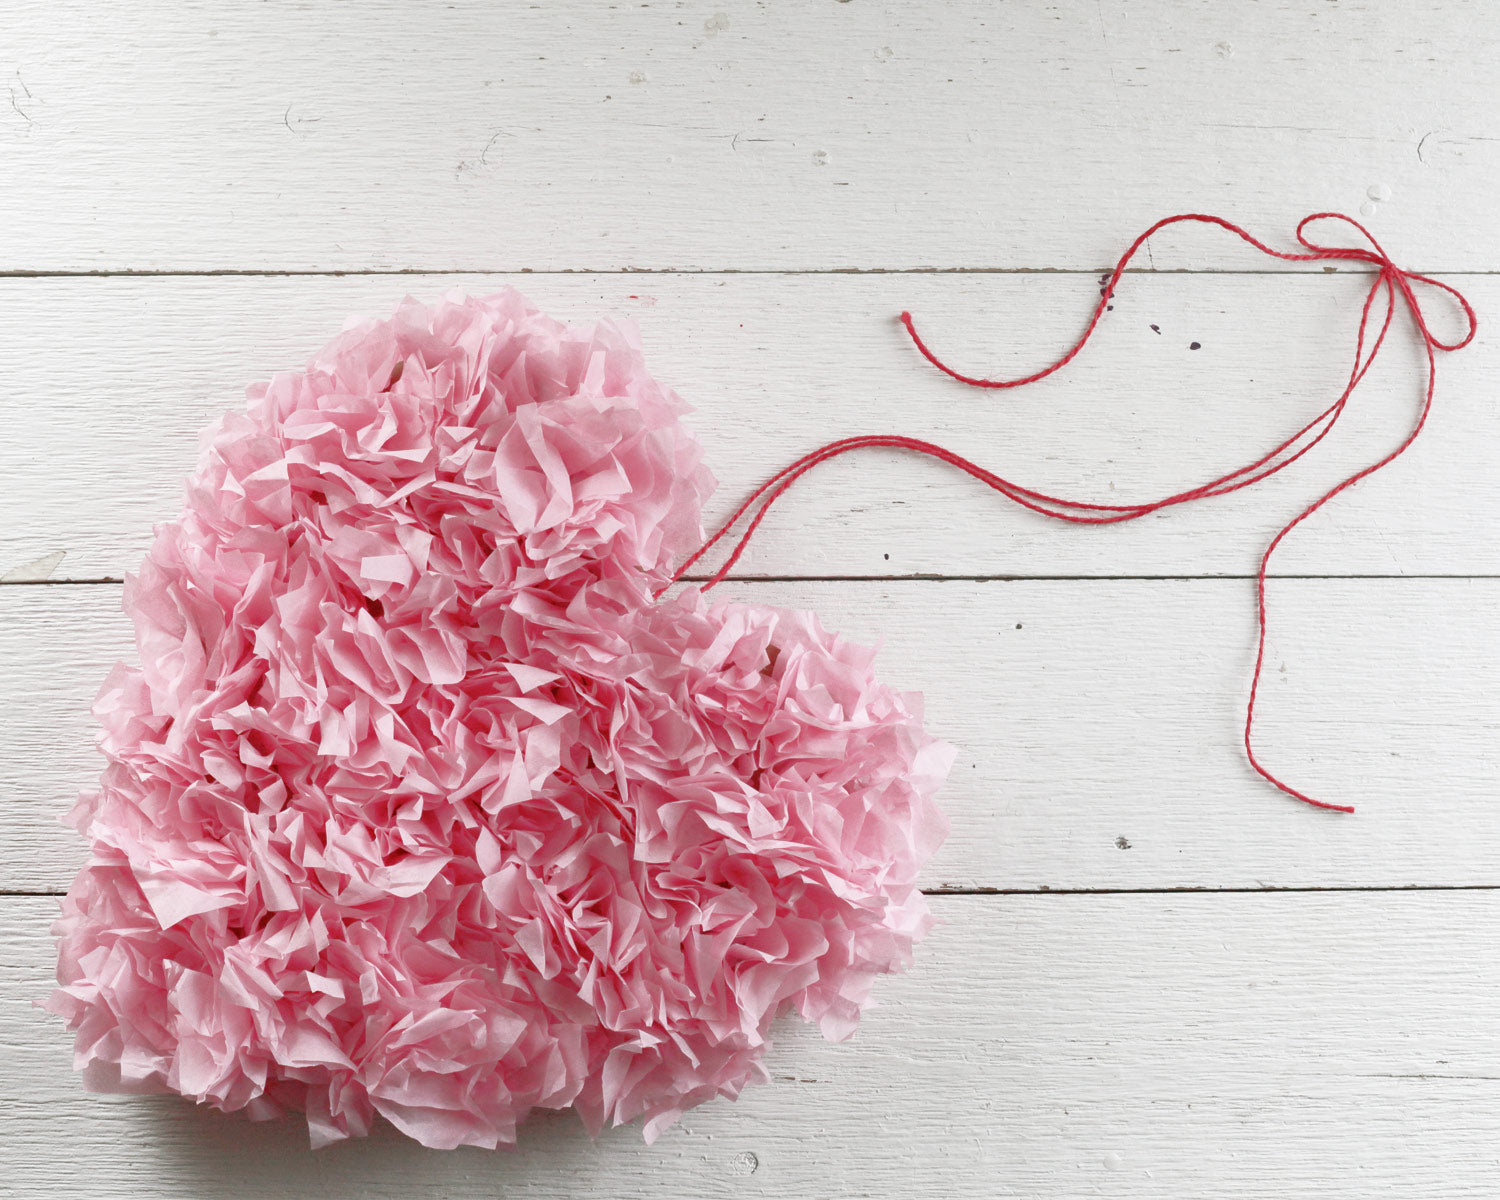
For this Valentine's day project, I borrowed a papercrafting technique that I learned back in gradeschool! Does anyone else remember applying squares of tissue paper with a pencil eraser to make a fluffy image? I believe it was an owl I made in my second grade class. I decided to make a big puffy heart this year for Valentine's using this oh-so-simple process. It's double-sided, so I can hang it in the window and have it look lovely from both inside and outside. This is a great, easy project for both adults and kids.
As Amazon Associates we may earn from qualifying purchases.
Supplies:
- Kraft paper, butcher paper, or poster board (just any large paper for the base)
- 8-12 sheets of tissue paper
- White glue (Elmer's,) glue brush
- Stapler, Hole Punch, Scissors, Pencil
- Red Jute Twine
Step 1: Remember how to make a heart template? Fold a large piece of paper in half, draw a freehand half-heart shape, cut it out, and unfold to reveal the symmetrical heart. You can re-fold and cut off extra bits to refine the shape. Then, use this template to cut out two large hearts from kraft paper, poster board, or butcher paper- whatever you have handy to be the base for the tissue to stick to. I made my heart about 12 x 12 inches.
Step 2: Cut lots of tissue paper squares in the color of your choice. I was shooting for roughly 2 1/2 inches square. The bigger the squares, the thicker the heart will be. Beyond about 3 inches though, it gets tougher to keep in them in place. The amount of tissue you use will depend on how densely you apply it. I used about 4-5 large sheets of tissue per side of the heart.
Step 3: Paint an even coat of white glue on a section of the heart. Place the eraser-side of a pencil in the center of a square of tissue, press the tissue down against the sides of the pencil, allowing it to crease slightly, and then press the pencil down onto the glue until the tissue sticks. Remove the pencil, and move on to the next square. Place the next square close to the last one. The tissue tends to 'settle' a little after you place it, so you'll need to adjust and fluff each piece as you work them into place. Continue to add glue and complete small sections at a time. Once you fill up the heart with tissue squares, you can go back through and fill in gaps.


Step 4: Repeat the process to make two hearts. Let them dry, and then place them back-to-back and staple together around the edges. Use a hole punch to make a hole through both layers, and add a loop of twine for hanging.