How to Make a Foraged Witch Broom for Halloween

This is a super easy project, and nearly free! Treat yourself to an autumnal nature walk, and bring along a bucket or a box and some snippers to collect some items. The materials you collect will vary according to what you have in your area. If you live somewhere with tall grasses, those work great. Where I live in the Pacific Northwest, I have a lot of mixed greenery and weeds to choose from.
As an affiliate I may earn commission from qualifying purchases, at no cost to you. Your clicks support my work.
Supplies:
- Bucket, garden snips, handsaw
- Collected plant materials: sticks, twigs, grasses, weeds, etc
- Branch 4-5 feet long
- Zip ties
- Black cotton fabric
- Button thread
Step 1:
Go for a walk to collect plant materials. Look for thin stems, twigs, long and straight vines, grasses and tree suckers, roughly 2 feet long each. Imagine the shape of a broom- it's made up of tightly arranged straight pieces. Avoid very green or tender types of plants as they will rot rather than dry. Instead, woody and firm stems work the best. Keep in mind that you may not want items with a lot of leaves. Depending on the type, they might wilt and fall off, and just generally make a mess. Be sure to get a good amount of material. When gathered together in a bunch, you want about two fistfuls.
In addition to your broom materials, you need a broomstick! Look for a branch about 1 1/2 inches thick or so, and select a piece that's 4-5 feet long. Trim off any side shoots, and saw the ends flat.
If you live in an area with pine cones, seed pods, or other interesting dried materials, grab some of those too for decoration.
Step 2:
Tidy and bundle the broom materials. Gather small bunches, removing any remaining leaves, flowers, and side-shooting branches. Create bunches with rubber bands, about an inch thick at the banded end. Cut the banded end straight across.
Step 3:
Gather the bunches around the end of the broomstick. Line them up about 6 inches from the end of the stick, and space them evenly around the branch. Use large zip ties, or connect two zip ties together to make one long enough to go around the bunched broom. Tightly zip tie everything together, and add one or two more bands of zip ties as needed to hold all of the materials firmly against the broomstick. Snip away the rubber bands.
Step 4:
Tear strips of black fabric about 2 inches thick to make rustic ribbons for decorating. Twine would also work beautifully. Wrap the strips around the broom, covering up the zip ties, and tie the ribbons tightly. Snip the ends, and push them underneath the wrappings.
Step 5:
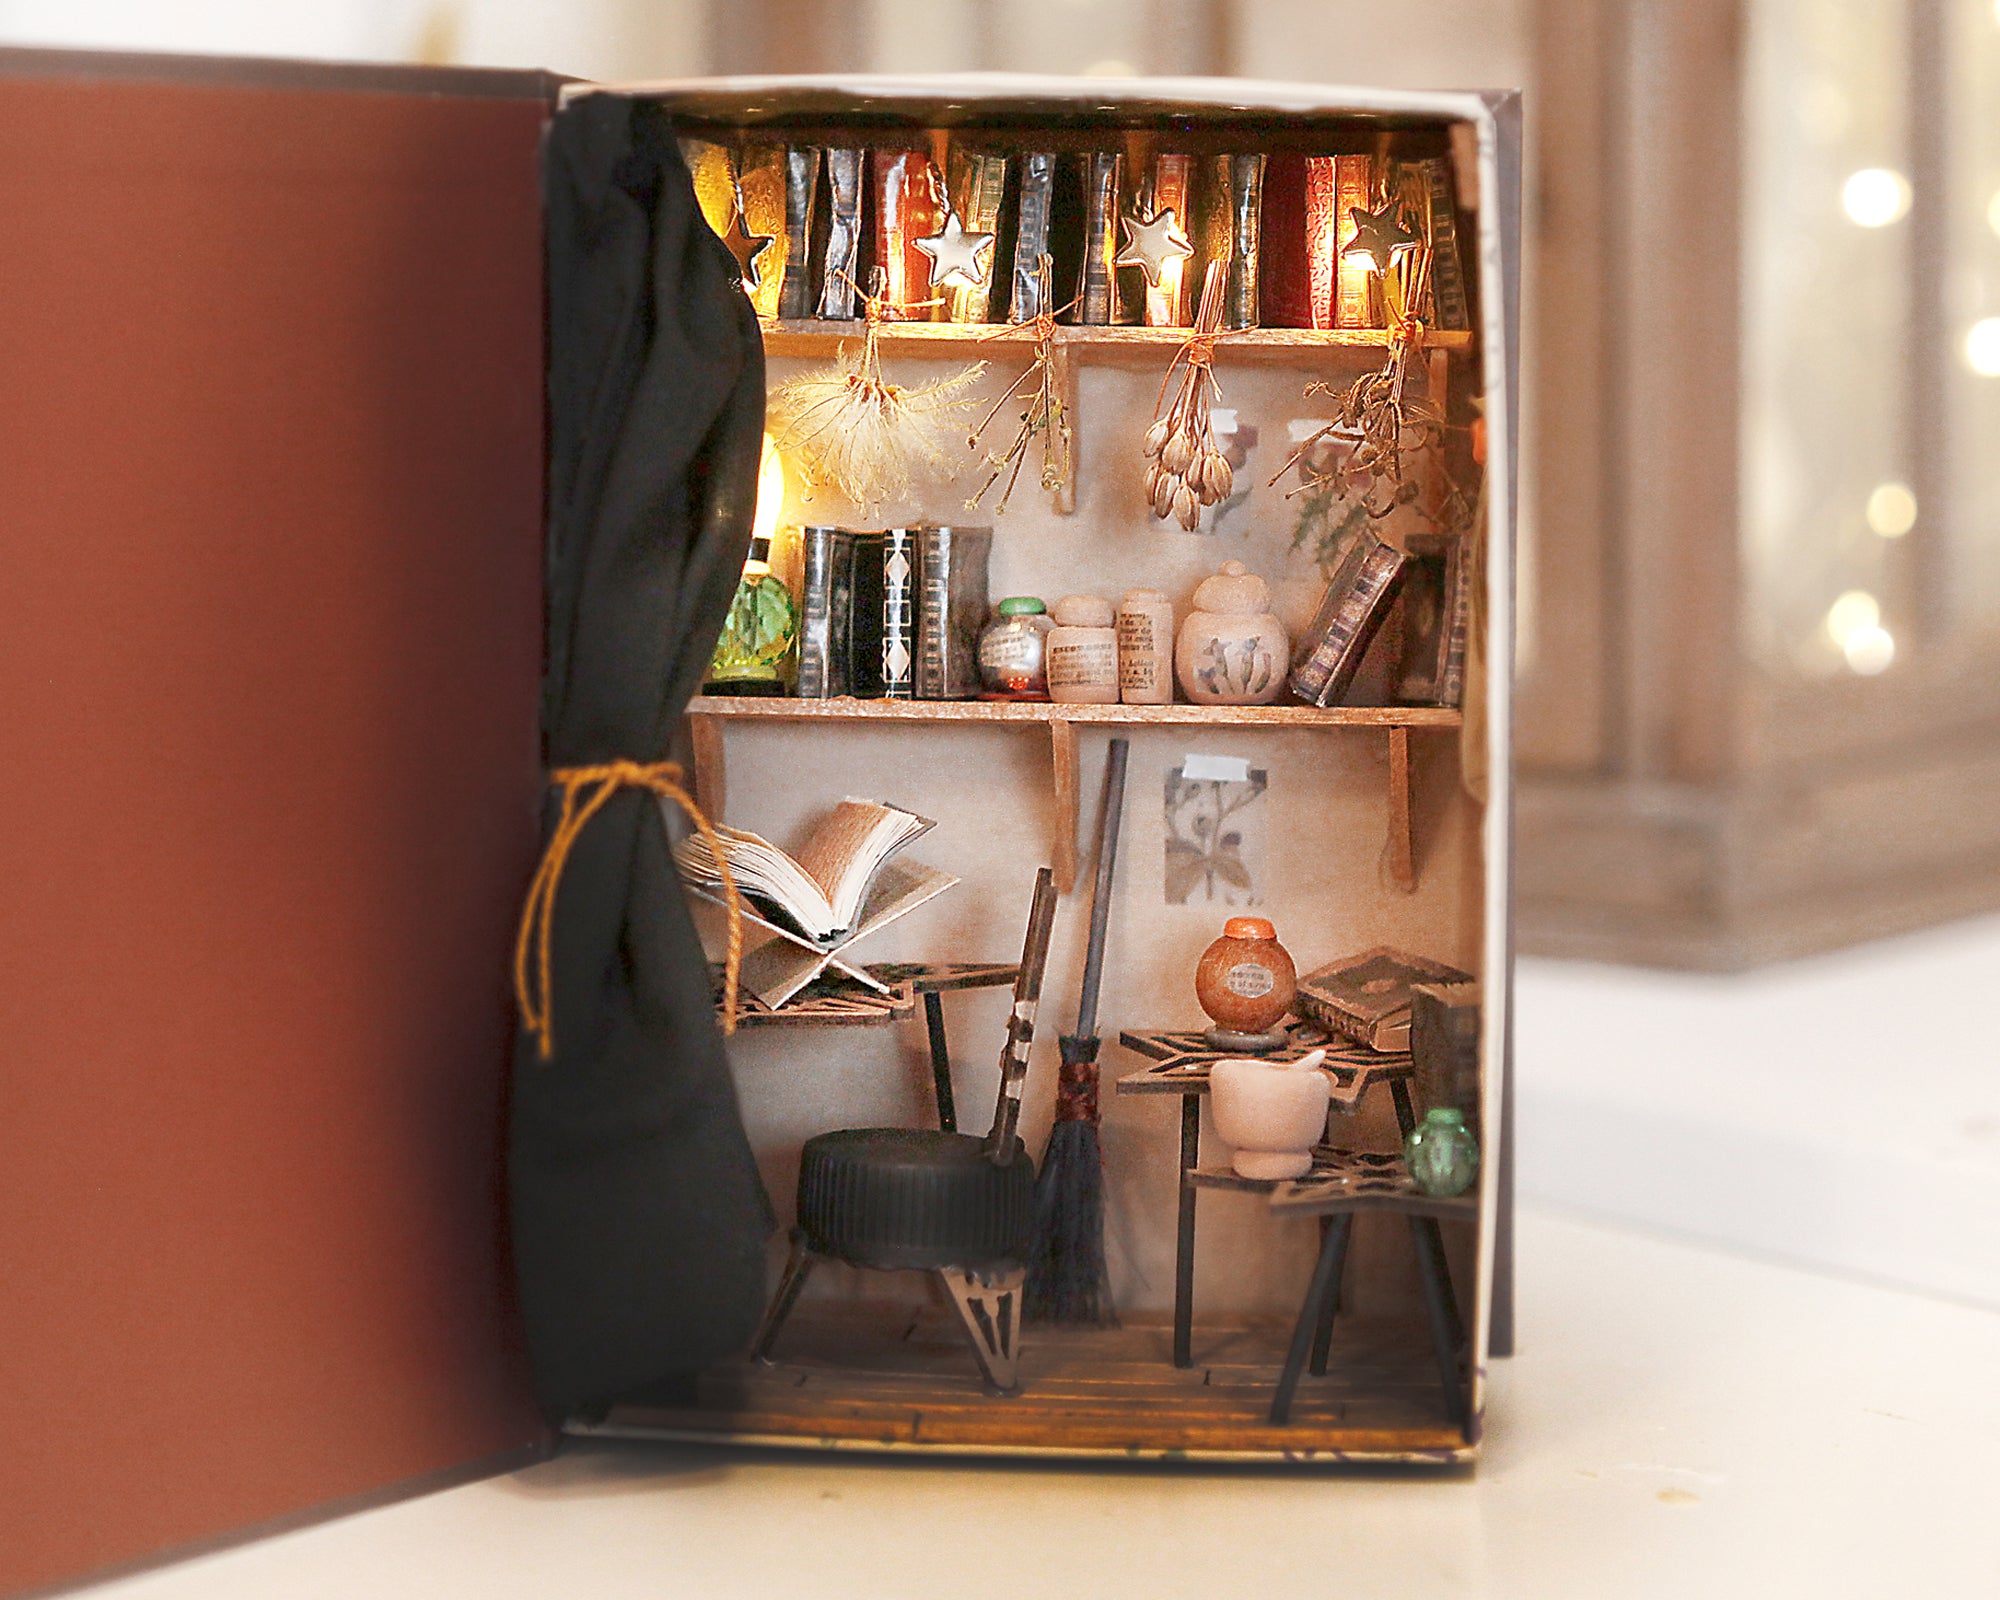
If you are embellishing with pine cones or seed pods, tie small lengths of button thread to those pieces so they can hang like tassels. Affix to the broom, and then finish by adding one more ribbon tied into a bow.
At the end of the season, most of these items are compostable.


