Retro Paper Christmas Candles made from Cardboard Tubes and Paper Rolls!
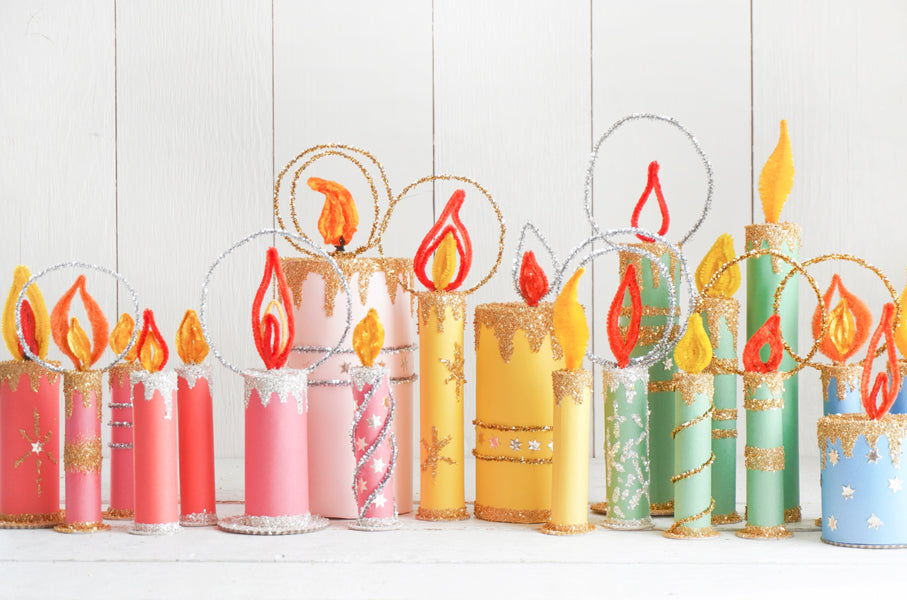 Collect household paper tubes to make these whimsical vintage style candle decorations for Christmas! In this paper craft project I am upcycling tubes from paper towels, toilet paper, aluminum foil, shipping labels, and ribbon spools. The larger pillar candles are made from Pringles canisters and an oatmeal box.
I am using simple kids construction paper as the base color for the candles, but you could certainly use pretty scrapbook papers or even Christmas wrapping paper! The chipboard bases keep the candles from tipping over. It would also be fun to make some miniature versions, and then glue clothespins to the bases so they can be clipped to Christmas tree branches or garlands.
In playing with these designs I found that adding lots of different textures created a really fun effect when the candles are displayed as a group. I used different types of pipe cleaners to make the flames including some with bump chenille doubled up to make thick flames. I looked at some vintage Christmas cards for inspiration when it came to creating different designs with glitter and trims on the candles.
As Amazon Associates we earn from qualifying purchases.
Supplies:
- Cardboard tubes and paper rolls in varying sizes
- Chipboard bases (I used this 1 1/2 inch size for skinny candles, and this 3 inch size for paper towel rolls and larger candles.)
- Construction paper
- Glue Stick
- Liquid clear-drying glue: Elmer's Glue-All and paintbrush
- Low temp hot glue gun and glue sticks
- Scissors
- Cardstock and scrap paper
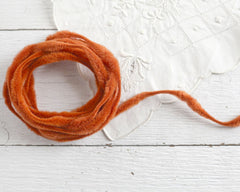
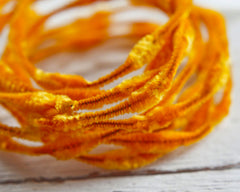
- Pipe Cleaners for Flames: Standard 12" pipe cleaners in red, yellow and orange, Harvest gold crushed velvet mini bump chenille, Bump Chenille in Orange, Vintage Burnt Orange Bump Chenille, Thick Bump Chenille in Orange
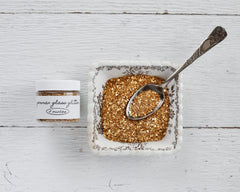
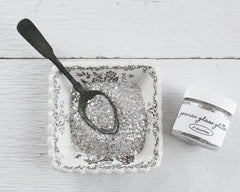
- German glass glitter in Gold and Silver
- Skinny Wired Lurex Trims in Gold and Silver
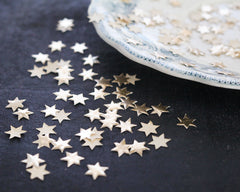
- Tiny Paper Stars
Step 1:
Collect paper tubes and rolls, and cut longer ones to varying lengths. Paper towel rolls can be cut with scissors. Thicker rolls like the ones from inside aluminum foil were easier to cut with a fine toothed hand saw.
Step 2:
Cut a piece of construction paper that is about an inch wider than the paper roll. Most papers have a "grain" that makes rolling easier in one direction than the other. I found that the construction paper rolled smoothly when the paper tube was placed on the short side. You can test it before applying glue to find which direction creates a smoother surface.
Working on a piece of scrap paper, apply a glue stick to the very edge of the paper. Roll up the tube, and press the seam to adhere the paper. Cut the paper so that it will overlap by about 1/2 inch. Apply glue to the edge and press to seal.
Fold in the ends of the paper.
Step 3:
Select a chipboard circle that's wider than the tube so that it will create a stable base for the candle. Aside from chipboard, bases can be cut from cereal boxes or wooden circles can be used. Use low temp hot glue to attach the paper tube to the base.
Step 4:
Fashion a flame out of a pipe cleaner. This is an opportunity to be creative and design interesting flames using various materials. For a simple flame, bend a 12" standard pipe cleaner in half, bend it into a teardrop shape, crossing the ends at the bottom. Twist the ends, and leave short tails for attaching to the candle.
Step 5:
Trace the top of the candle onto cardstock. Cut out the circle inside the pencil line, and poke a hole in the center with the point of the scissor blade. Insert the tails of the candle flame, open them, and secure with glue on the underside of the cardstock.


Step 6:
If making a candle with a glow halo, bend a piece of tinsel cord into a circle with 1/2 inch extra on each end to attach to the candle. Glue each end just inside the top of the candle.
Apply glue around the top edge of the candle, and attach the cardstock circle with flame. Press around the edges to form a seal.
Step 7:
Decorate! Create fun designs with glitter and trims. To add bands of glitter, apply clear drying glue from the bottle, and smooth out the line with a paintbrush. Sprinkle on German glass glitter over a bowl, and tap off the excess. Apply tiny paper stars with dots of liquid glue, or use a glue stick to apply glue to the backs before pressing onto the surface. Create swirls of tinsel trim by gluing 2 or three long lengths at the top of the candle, twisting them around the candlestick and then gluing at the bottom.


Step 8:
Apply liquid glue to the entire top of the candle, spreading it out with a paintbrush. Use the tip of the glue bottle to 'draw' dripping candle wax around the top edge of the candle. Even it out with the paintbrush so that the glue is not actually dripping.
Douse the entire top with glitter, and tap off the excess.
Step 9:
Apply liquid glue to the base of the candle, extending a band up onto the lower part of the candlestick. Glitter, and let dry.


