Making a Halloween Doll with a Vintage Hanky!
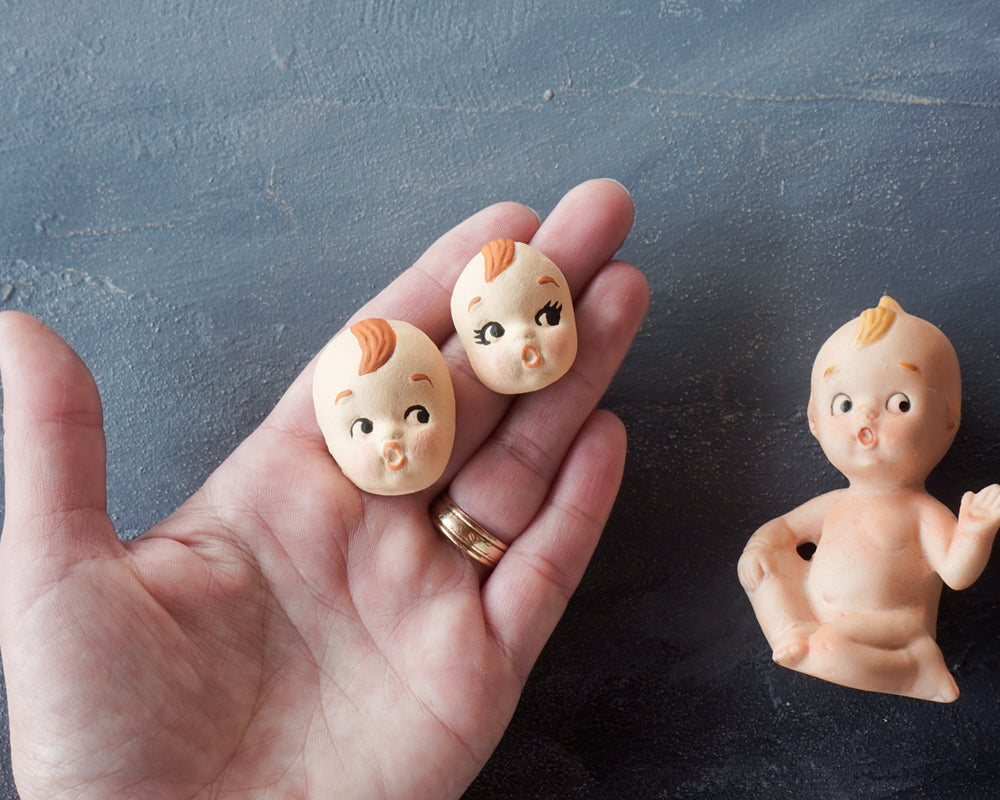
 In the last tutorial I shared how to make clay Kewpie doll faces from a vintage figurine. You can find that project here. Today, I'm using the face to make a little 1920s ghost doll for Halloween! The idea is to make the handkerchief look like a little kid is wearing a tablecloth to dress up as a ghost. I am using a 10" square hanky, so the figure will end up about 4 1/2 - 5 inches tall. I'm going to build a simple, and not too detailed, form to be the body. You can use just about anything for this- crumpled paper, aluminum foil, a small jar with some cotton draped over it- whatever you might have on hand. I am using a 97mm spun cotton cone and a 30mm spun cotton ball, and the arms will be foil. A layer of cotton coil over the form will unify all the pieces, and give it a plush, white texture over which to lay the hanky.
Supplies:
- 97mm spun cotton cone
- 30mm spun cotton ball
- Aluminum foil
- Low temp hot glue gun, glue sticks
- 10" handkerchief
- Cotton coil
- Cornstarch medium (see below for preparation)
- Jar and paintbrush
- Approximately 1 1/4 inch clay face - instructions for making them here
- Wax paper
Step 1: Build a rough form for the head and body. The total height should be half the width of your handkerchief. I am using a 97mm cone, and glued a 30mm spun cotton ball on top. For the arms I rolled up some aluminum foil, glued it to the back, posed, and trimmed the length.
Step 2: Wrap the entire figure in cotton coil, or medical cotton. Tack down with glue in a few spots to keep it in place.
Step 3: Prepare a thick starch medium to use as a stiffener: Bring 1 cup of water to boil in a pot, and reduce heat to simmer. In a bowl, mix 1 1/2 tablespoons of cornstarch with an equal amount of water to make a slurry. Add the slurry to the simmering water a spoonful at a time, stirring to dissolve. Stir continuously and let the starch mixture simmer for 2 minutes, or longer if you see remaining lumps. Let cool and transfer to a jar.
Step 4: Set the form on a piece of wax paper. Brush the cotton covered figure with starch to unify the piece and keep the cotton in place. It does not need to be saturated- just brushing a layer of starch on the surface will be sufficient. Set the form somewhere warm for a couple hours until the surface is dry.
Step 5: Lay the handkerchief squarely over the piece with a flat edge facing the front of the figure. Tack the fabric to the front of the head with a dot of glue and press to make a flat surface for the face. Apply glue to the back of the doll face, and position it on the front of the head, gluing it to the handkerchief. Press until the glue sets.
Step 6: Put your hand underneath the hanky, and brush starch liberally over the fabric until you can see your hand through it. Coat the entire handkerchief so that it is wet to the touch. Now, spend some time draping the hanky over the arms, and create folds and creases to accentuate the shape of the figure. Once the starch is dry, the hanky will be stiffened, and the positioning of the fabric will be held in place. You can creatively arrange the fabric to look like it's caught in a breeze, sweeping off to one side, or dragging behind the figure. Place the figure somewhere warm to dry, and then peel it away from the wax paper.
