Paper Flower Tutorial: Storybook Paper Roses
I originally did this tutorial for 100LayerCake.com, and it remains one of my favorite projects. Here I'll share the original post, plus some extra photos and details about how I make paper roses.
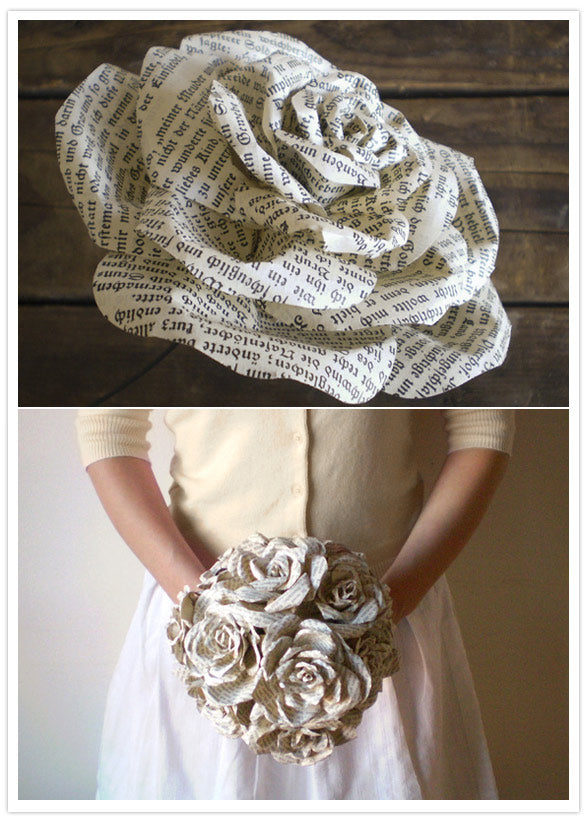
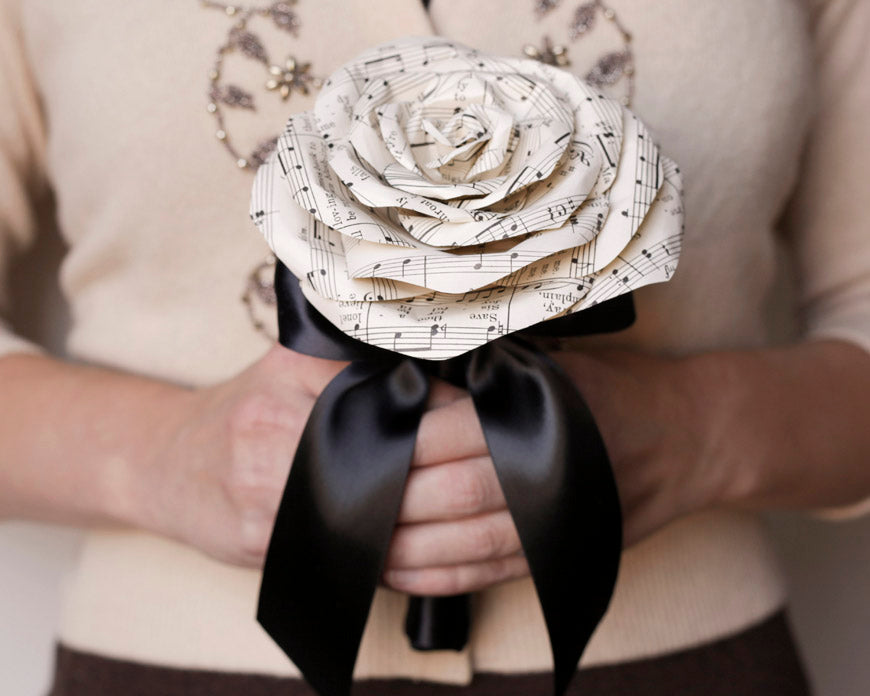
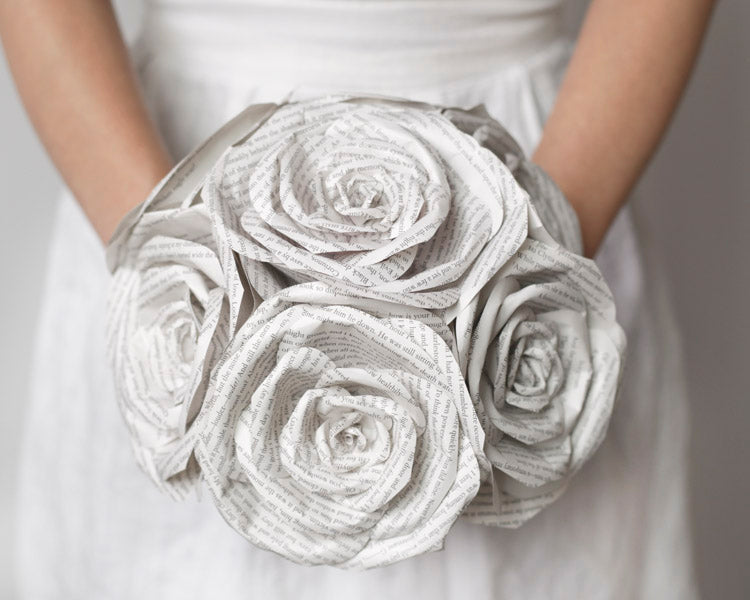
These unique flowers can be bound into bouquets, or worked into creative centerpieces and decorations. I use antique books to create my flowers, and I love the combination of the ivory paper and old world typography. You can use a favorite poetry book, sheet music, newspaper – anything!
Watch the video:
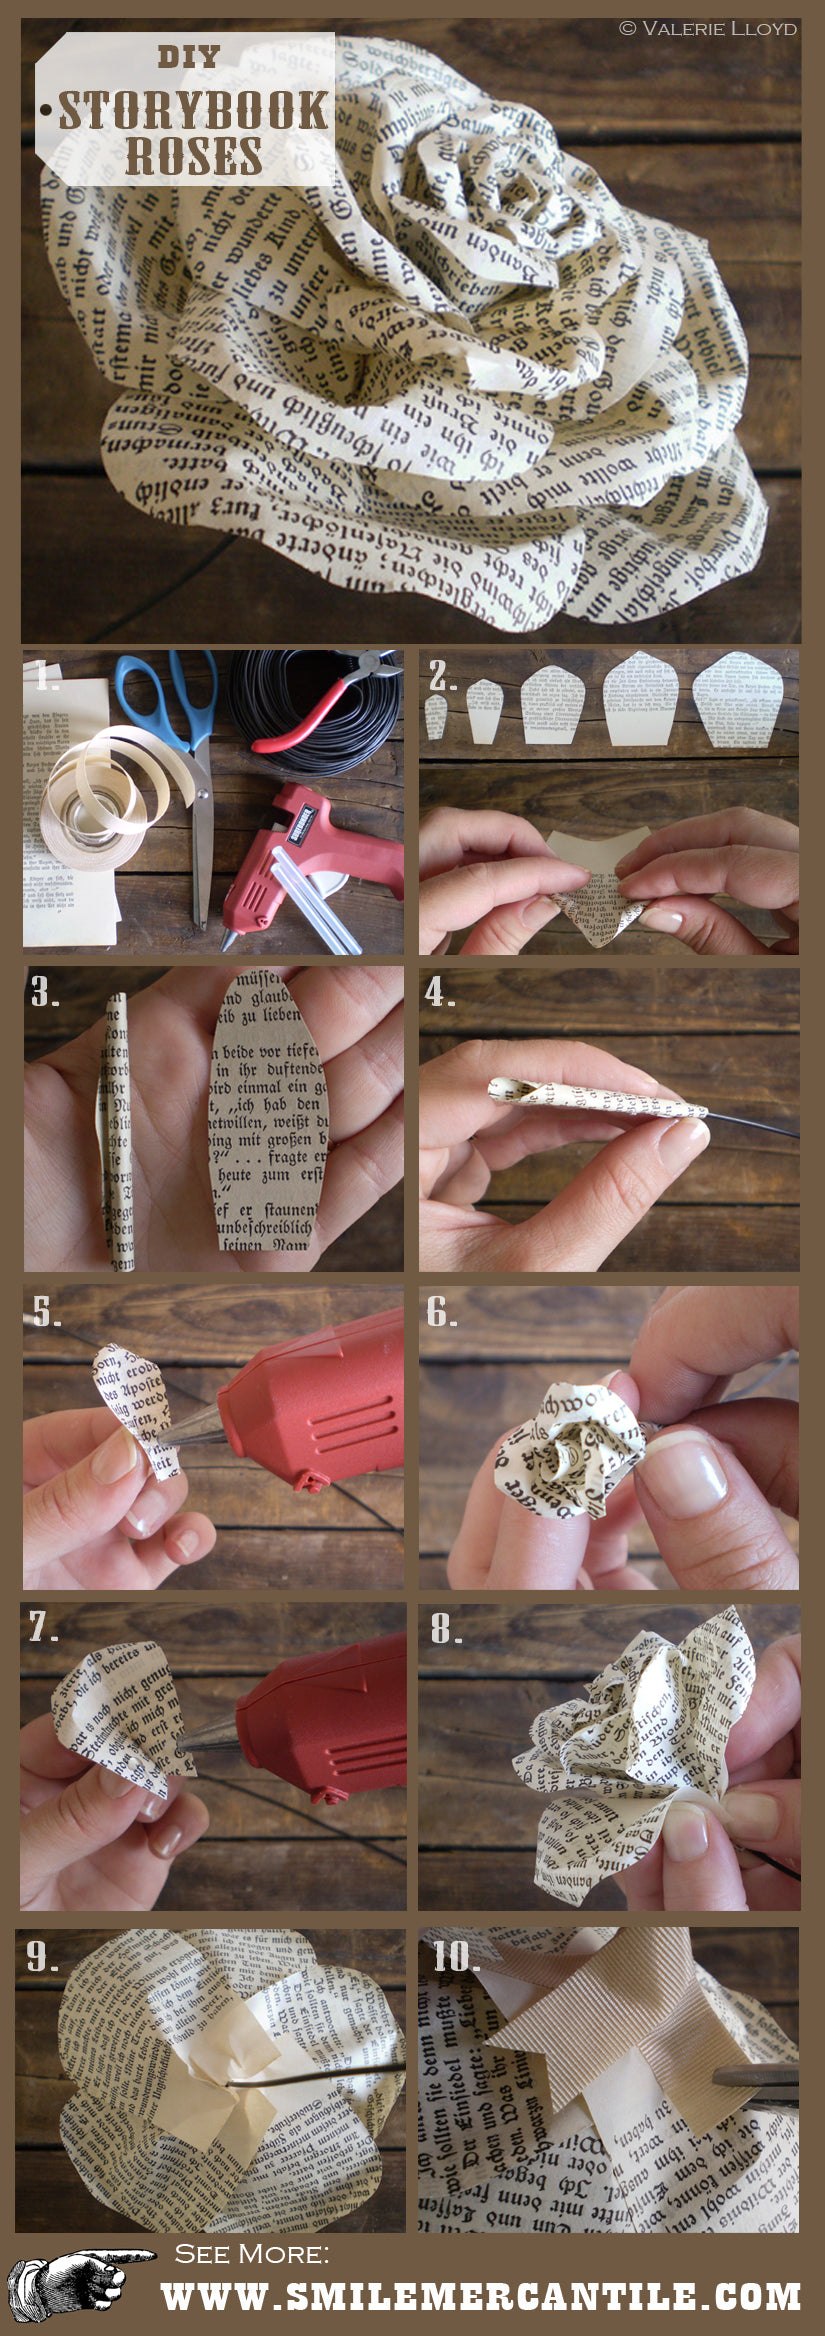
Supplies:
- Book pages
- grosgrain Ribbon, ½ Width cut to 4 inch lengths
- 16 Gauge Wire cut to 15 inch lengths
- Glue Gun
- Glue Sticks (low temp)
- Scissors
- Wire Cutters
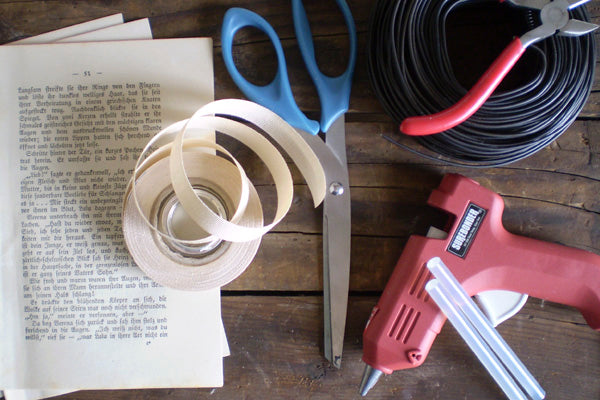
Step 1: Gather materials. If you are using vintage books or sheet music as your paper source make sure it is still flexible enough to curl with your fingers. The wire can be found at the hardware store, and is sometimes called “black wire” or “annealed coil wire.” This wire is flexible, but still very sturdy. If you are making naturalistic roses you can wrap the wire in green floral tape. I tend to enjoy the simplicity of the wire as it is.
Be sure you are using low temp hot glue because you’ll be able to feel it right through the paper petals as you work.
Step 2: Cutting. You will need to stockpile at least 5 different sizes of petals ranging from about ¾ inch wide to 3 inches wide. I cut freehand, and avoid templates, so that each petal is a unique and organic shape. Think of the shapes as little church windows or arches. Some can be pointy, and some can be rounded. For each flower you will need at least 4 of each size. Make more than you need. For the roses you see here the smallest petals are about 3/4 x 1 1/2 inches, and the largest petals are up to 3 1/2 x 3 1/2 inches.
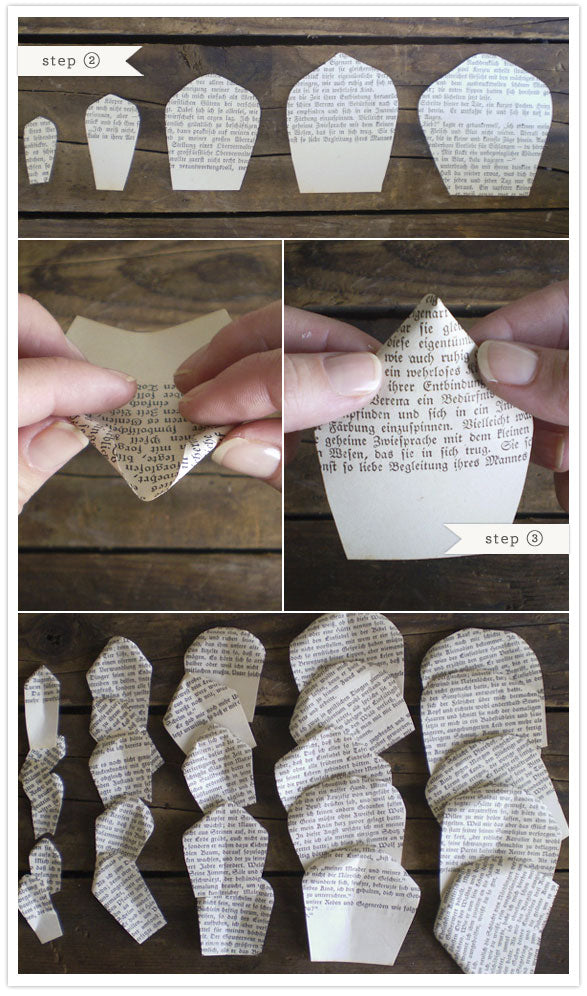
Step 3: Shaping. I really feel that this is the most important step to create natural and soft looking flowers. Roll the edges of each petal, and pinch the base slightly. Each one can be done a little differently to give the petals character and roundness. I shape all of my petals before I even begin gluing anything.
Step 4: Rolling the center. You need to cut out one more shape for each flower, and this is for the coiled center of the rose. This shape should be about 2 ½ inches long with a rounded tip. Roll it up into a tube to create its shape. Unroll it and run a bead of hot glue along the inside and re-roll it around the end of your wire. Another dot of glue will hold it in place.
Step 5: Attaching petals. Begin with your smallest petals. Use a single dot of glue, about ¼ inch from the bottom of the petal to attach it to the stem. Your next petal should overlap the first. Continue adding small petals, rotating the stem as you go, always slightly overlapping the last petal you attached. This is where your artistry will come in as you continue to rotate and build. As you begin adding larger petals pinch the bases, as they are much wider. By pinching at the bases you will be rounding out the rose, and creating space between layers.
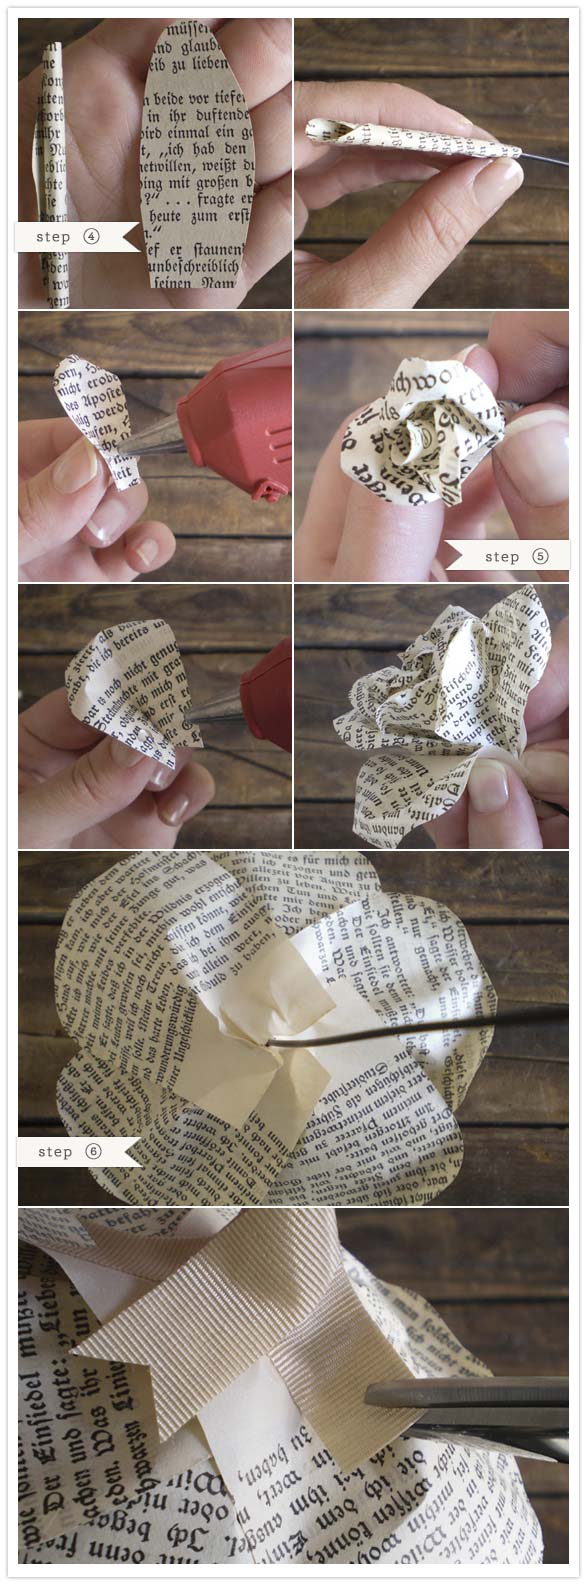
Step 5: Finishing. The sepals will be made of ribbon, which will also cover your final seams and create a nice polished look. Each rose needs two - 4 inch lengths of ribbon. Wrap them around the stem and secure to the undersides of the petals. Cut a ‘V’ into each end of the ribbons to finish.
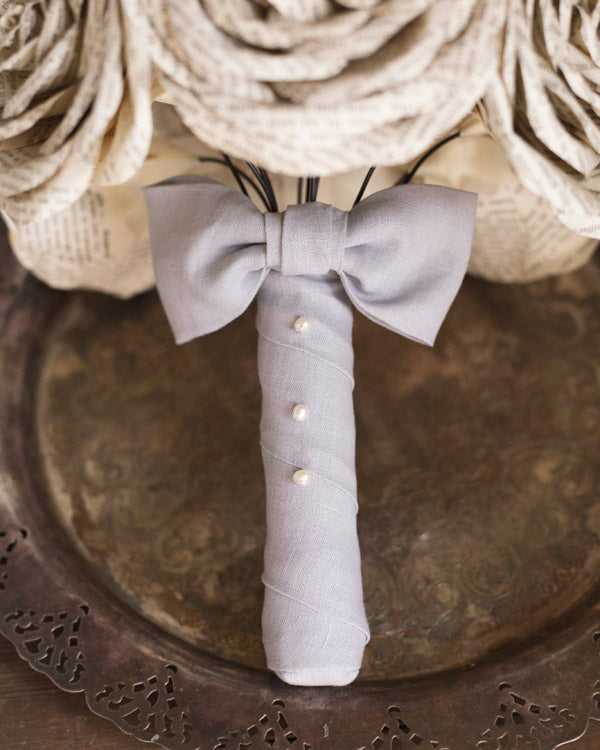
If you are making a bouquet gather all of the stems together, nestling the roses together. Wrap the stems tightly with floral tape. Use wire cutters to even out the ends of the wire stems. I like bouquet handles to be about 5 1/2 inches long. It's personal preference, but I find longer bouquet handles start looking odd and less photogenic. I like to wrap the handles in 3 or 4 layers of cardstock to thicken and cushion before covering it in ribbon or twine.

Love it? Pin it:
