Spun Cotton Spring Birds with Coffee Filter Bonnets and Ruffs

I love combining spun cotton with pipe cleaners. It immediately makes a decoration look vintage! For these happy spring birds I picked out paint colors that matched some pastel pipe cleaners, and used old fashioned pipe cleaners for the feet (found here.) You could use colorful crepe paper for the ruffs and bonnets, but I decided just to use unbleached coffee filters instead.
As affiliates we earn from qualifying purchases.
Supplies:
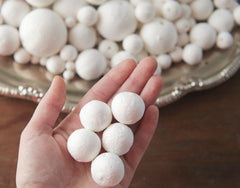
- 25mm Spun Cotton Ball
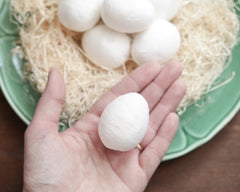
- 45mm Spun Cotton Egg
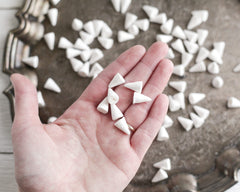
- 14mm x 9mm Spun Cotton Cone or 12mm x 8mm Yellow Tinted Spun Cotton Cone
- Standard 12" pipe cleaners in pastel colors
- Old fashioned cotton pipe cleaners
- Acrylic craft paints in pastel colors
- Paint brush, bamboo skewers, foam block
- Scissors
- Unbleached small coffee filters
- Button thread, needle
- Low temp hot glue gun, glue sticks
- Sharpie or black paint for eyes
Step 1:
Glue the 25mm ball to the smaller end of the 45mm egg. Place it just off to one side, not right on the end of the egg (the end without the hole.) This will give the bird its body shape. Insert a skewer into the hole at the wide end of the egg, and use the skewer as a handle so you can paint it all in one go. Paint the body and head in the color of your choice, and set it up on the foam block to dry. Insert a skewer into the cone, paint it yellow or orange, and set it up to dry.
Step 2:
Feet: Bend the short old fashioned pipe cleaners into a 'Y' shape. Start the shape at the center of the 'Y', make the toes about 3/4 inch long, then extend the 'heel' back about 1/2 inch, and finish the shape back at the center of the 'Y'. The extra bit of pipe cleaner will bend back at an angle and serve as the bird's leg.

Step 3:
Wings: Bend the end of a 12 inch pipe cleaner into a teardrop shape, about 2 inches long and 1 1/4 inches wide. Twist to secure the end to the rest of the pipe cleaner. Then, use the rest of the pipe cleaner to 'fill in' the shape by making smaller teardrop shapes within the outer line. Use dots of hot glue to secure the shape if needed. When complete the wing should be fully filled without any gaps.
Step 4:
Insert the legs into the hole on the underside of the body. Angle the pipe cleaner legs back, and then set the bird up on its feet on a tabletop, separating the feet a little bit to give it a wider stance. It will wobble and fall over until you find the right counterbalance. Each bird will have a slightly different angle and you'll need to make adjustments to the angle of the legs to find the balance. Once it stands up on its own, you can add the wings, gluing them just at the tops close to the neck. Add the beak, and then either draw in the eyes with a marker, or dab on a little black paint with a toothpick.

Step 5:
Ruff: Cut a 1/2 x 10-inch strip from the outer edge of a coffee filter. Thread a needle with button thread, and sew a small running stitch on the inside edge of the strip. Gather gently, and form the ruffle. Place around the bird's neck, and tie a bow at the front.
Bonnet: Cut a coffee filter in half. Cut a semicircle out of the center, leaving about an inch of paper inside the fold. Then cut the ruffled part off except about 1/2 inch outside the fold. The resulting shape is like a rainbow. Sew a running stitch just inside the lower edge. With a different piece of thread, sew a running stitch on the fold itself. First pull the threads on the lower edge, gathering the inside completely. Tie a knot and snip the ends. This will have created a cupped shape, which is the back of the bonnet. Then, set the bonnet on the bird, and pull the threads along the fold line around the bird's face. Tie this thread under the chin. Fold up the ruffled edge of the bonnet around the face.


Products featured in this tutorial:

PIN ME:
