Vintage Craft: Pine Cone and Felt Victorian Carolers
 These pine cone and felt carolers are part of my vintage craft series: wonderful projects found in vintage craft books brought to life! I collect vintage craft books, and flipping through them I always say, "I want to make this!" so I'm giving these projects a go.
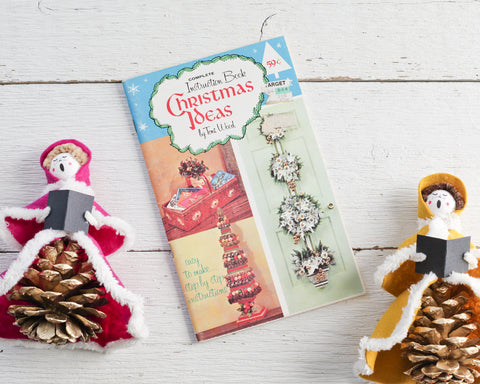
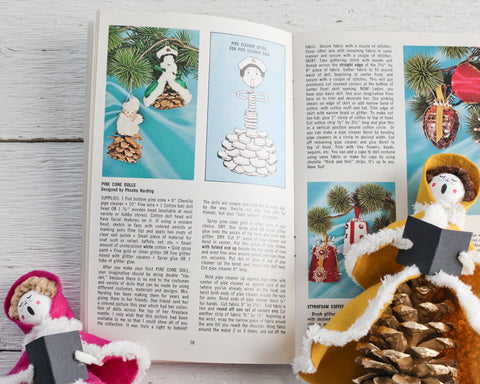
I adapted this project from an adorable vintage craft booklet called "Christmas Ideas" by Toni Wood, 1971. I think the original concept was meant for these to be miniature sized- small enough to hang on a Christmas tree. I used full size 3-4 inch pine cones, so my carolers are actually more like dolls than ornaments, and they are large enough to line up on a mantel or to use in a centerpiece. I designed printable templates for the costumes, and the pdf is available to download for free below. These ladies look a bit fancy, but they are actually very easy to make!
As Amazon Associates we earn from qualifying purchases, at no extra cost to you. Your clicks support my work, thank you!

Supplies for one caroler:
- Pine cone: the dresses are sized to fit a 3 1/2 inch high pine cone. Try to select one with a stable/flat base.
- Small Wooden Spool (approx 1 1/4 inch tall)
- Felt: approx. 8 x 10 inches
- 1 Yd. Wired fur trim
- 30mm Choir Spun Cotton Head
- Two 6.5 inch Old fashioned Pipe Cleaners for neck and arms (standard pipe cleaners cut to length may be substituted)
- One standard pipe cleaner for hair
- Metallic spray paint
- Low temp hot glue gun, glue sticks
- Scrap Cardstock
- Costume Template Click HERE to download (print at 100%, do not scale.)
Step 1:
If your pine cone has a pointed top, snip it off with garden snips so that the top is relatively flat. Use low temp hot glue to attach the wooden spool to the top of the pine cone. Hold it straight until the glue sets. Lay it on a dropcloth or newpaper outside and spray paint the whole thing gold or silver.
Step 2:
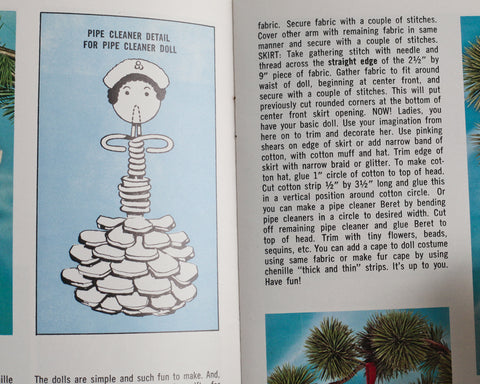
Fold an old fashioned pipe cleaner in half, apply a dot of glue at the end, and insert it into a 30mm spun cotton head. Snip the ends of the pipe cleaner so that when they are inserted into the top of the spool, the head has about a 1/2 inch 'neck.' Glue the pipe cleaner in place and position the head and neck.
Step 3:
Make the arms: Fold a 6.5 inch pipe cleaner in half to find the center. Unfold it, and bend back both ends of the pipe cleaner about 1/2 inch to fashion the 'hands.' Create two more bends to be the elbows. Apply a dot of glue to the very center point, and attach the arm segment to the back of the neck. Hold in place until the glue sets, and then bend the pipe cleaner down over the edges of the spool to make shoulders.
Step 4:
The printable costume template is HERE. Print out on standard 8 1/2 x 11 inch paper (uncheck any printer settings that scale a file,) cut out the template, and trace onto a piece of felt. Cut out all three pieces. Wrap the skirt around the spool to check the length, and trim if needed to fit the height of your pine cone.
Step 5:
Working in sections, run a bead of glue around the edges of the skirt and apply the wired fur trim. Do the same for the capelet. To shape the hood, apply a dot of glue to the edge of each tab, overlap the tabs, and the felt will take on a cupped shape. Apply wired fur trim to the lower edge of the hood.
Pipe cleaners or other wired trims may be substituted for wired fur trim.
Step 6:
Attach the skirt to the back of the spool with glue. Hold in place until it sets, and then apply glue to the front of the spool to secure the sides of the skirt. Overlap the front panels of the skirt and seal with glue. Attach the capelet to the top of the spool, first one side, overlap the front panels, and then secure the other side. Adjust so that the arms are free at the front. The wired fur trim may be bent to create a ruffled effect along the lower hems. Attach the hood by gluing each side to the underside of the chin.
Step 7:
Create the hair: Select a piece of pipe cleaner for the hair, and bend it back and forth in a tight zigzag pattern, wider at the ends and slimmer in the middle, until the piece is about 2 inches long. Snip off the excess pipe cleaner and bend the zigzag segment to fit the head. Hold it in place under the hood, and make adjustments before gluing it down.
Step 8:
Cut a piece of cardstock about 1 x 2 inches, and fold it in half to create a songbook. Glue to the hands.


