Winter Cottage Snow Globe Ornament - Sweet Christmas Craft
 In this project I am creating a snowy winter wonderland inside a glass snow globe ornament to hang on a Christmas tree. The empty glass ornaments come in round globes, bell shapes, and domes. To make the scene, plastic miniatures are coated in sparkling clear German glass glitter that looks like sugar. A frost pattern is applied to the outside of the globe by painting clear-drying glue onto the glass, and then sprinkling with glitter. A spoonful of glitter flakes inside the globe dances loosely around the scene.
Supplies:
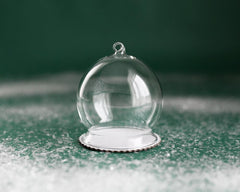
- Glass snow globe ornament with chipboard base - UPDATE: This item has been discontinued.
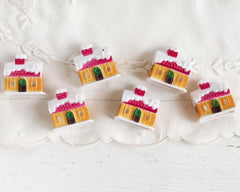
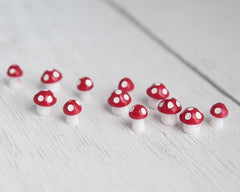
- Plastic cottage and miniature plastic mushrooms
- Clear German glass glitter
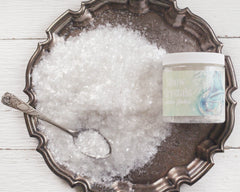
- Snow Crystals Glitter Flakes
- Quilt batting
- Elmer's Glue-All
- Hot glue gun + glue sticks
- Paintbrush, glitter bowls, mug, spoon
Step 1:
Use a medium-sized paint brush so that the glue pattern can be applied quickly. Elmer's Glue-All goes on white, but dries clear. It is water soluble, so if you make a mistake with your design you can wash it off and start over. Start by painting glue all the way around the top hanging loop. Then, using the side of the brush, draw the glue down into a point, like drawing a "V." Lightening the pressure on the brush at the tip of the V will keep the point looking sharp. To keep the pattern even, make a point on one side of the globe, and then make on one on the opposite side. Begin making points between those two, and continue adding points in between until the points continue all the way around the ornament. Go over the points once more with the brush to smooth out the glue, removing any excess to avoid drips. Sprinkle the glue with glitter over a bowl, and tap off the loose bits. Allow to dry.
Step 2:
Coat all sides of the plastic cottage with glue, and sprinkle with glitter. Do the same for the caps of the tiny plastic mushrooms. Allow to dry.
Step 3:
Cut a piece of batting to fit just inside the lower rim of the globe. Use hot glue to apply it to the chipboard base. Arrange the miniatures on the batting, and place the globe on top to check that the pieces fit inside. Once you have the composition planned out, hot glue all of the pieces in place.
Step 4:
Turn the globe upside down, and set the round part on a mug or a jar. Spoon in a scant teaspoon or two of snow flakes into the globe. Apply glue to the rim of the glass globe, and then turn the chipboard base with its attached miniatures upside down and set it on top. Press the base onto the ornament, and while holding it in place, turn it right side up and set it onto the table. Press the glass onto the base and hold for 20 seconds to secure the bond. Allow to dry.
Step 5:
Paint glue around the lower edge of the glass, and onto the chipboard base. Sprinkle with glitter and let dry.


Products featured in this tutorial:
![]()

