Speckled Spun Cotton Easter Eggs DIY Tutorial
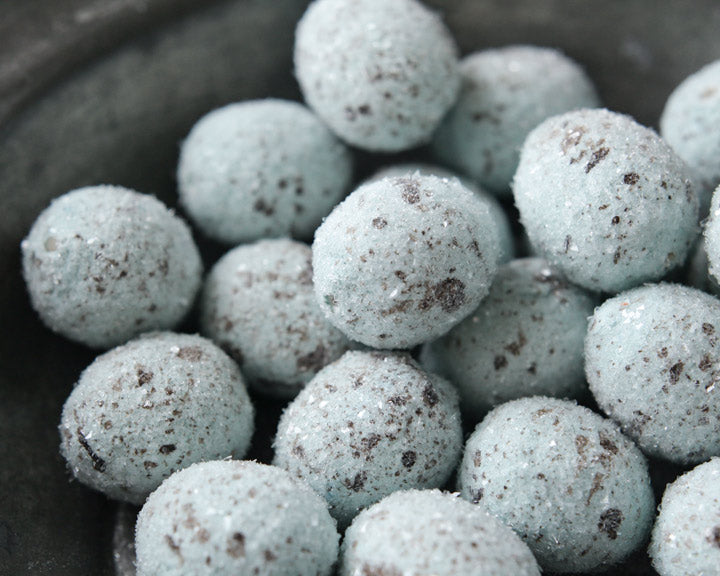
In this tutorial I'm making speckled spun cotton Easter eggs. These are so darling. I did a similar project last year, but this time I've added a coat of clear glass glitter. You can paint them any color you like, but today I'm making lovely blue eggs. They look gorgeous included in wreaths, or if you have a found bird's nest you can nestle them together to make a pretty centerpiece or Easter vignette. In this tutorial I'm working with 30mm spun cotton eggs, which are roughly the size and shape of real quail eggs. So pretty!
The speckles are made using an old toothbrush, and it can get a little messy, so you'll want to put down some paper to protect your work surface. You can also set a cookie sheet down in the bathtub to contain the eggs, and then just run the shower to clean up any stray spatter afterwards.
Supplies:
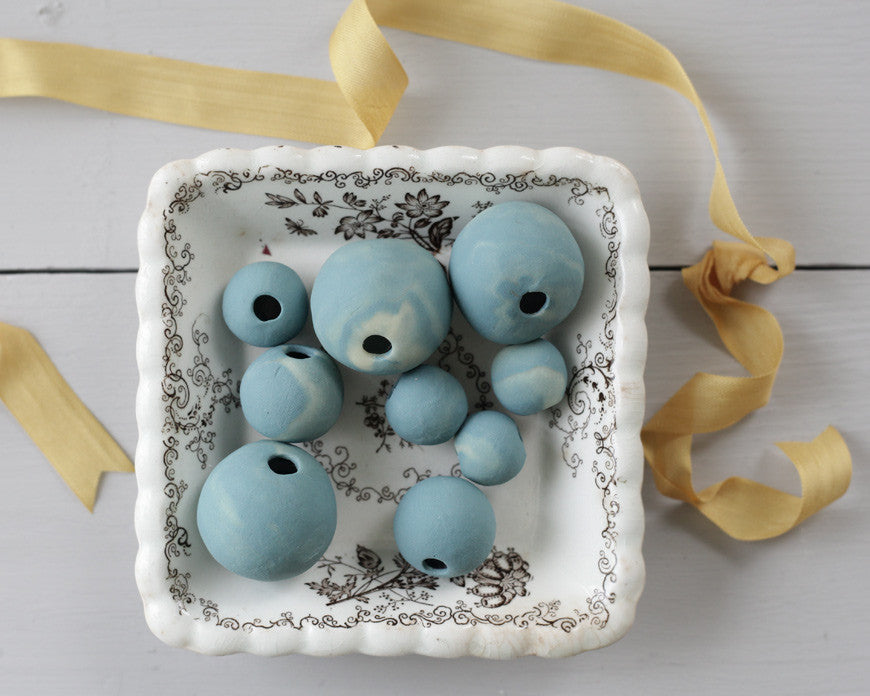
- 30mm spun cotton eggs
- Blue acrylic craft paint, raw umber (dark brown) craft paint
- Water
- Paint brush
- White glue
- Old toothbrush
- Glass glitter
- Toothpicks or small skewers
- Styrofoam block
Step 1: Add water to acrylic paint.
Mix a little water into some paint in the color of your choice. You want the paint to be a little runny, but not translucent.
Step 2: Paint spun cotton egg.
Use toothpicks, skewers, or little craft sticks to hold the eggs. These will let you paint the entire egg in one go. Paint the whole egg, and then insert the toothpick into a styrofoam block to let it dry.
Step 3: Use old toothbrush to make speckles.
You can use undiluted dark brown paint for this step as long as it's in a liquid form. If you're using brown paint that came in a tube rather than a bottle, you may want to add just a touch of water so that it's the consistency of melted chocolate. Cover your work space, and use your finger to flick spatters off of the brush's bristles. Once you've gotten a good spray pattern, turn the eggs to cover all sides.
Step 4: Add splotchy details.
Quail eggs have a cool splotchy pattern that's very irregular. Dip the tip of the toothbrush in the brown paint, and press it into the sides of the eggs in a few areas. Not every area of an egg needs this pattern, just a few blotches here and there will look nice. Let the eggs dry completely before moving on to the next step.
Step 5: Paint with glue & coat with glitter.
Put the eggs back on their little toothpicks, and paint each one with a coat of white glue. Spoon some clear glass glitter on the entire surfaces of the eggs. Stick them back on the styrofoam block to dry. The glue will dry clear, so the lovely color and pattern will show through the glitter.
And there you have it!
Or, if you'd like some that I've made, they are available here in the shop:


