DIY Celestial Lighted Witch Hat Headband
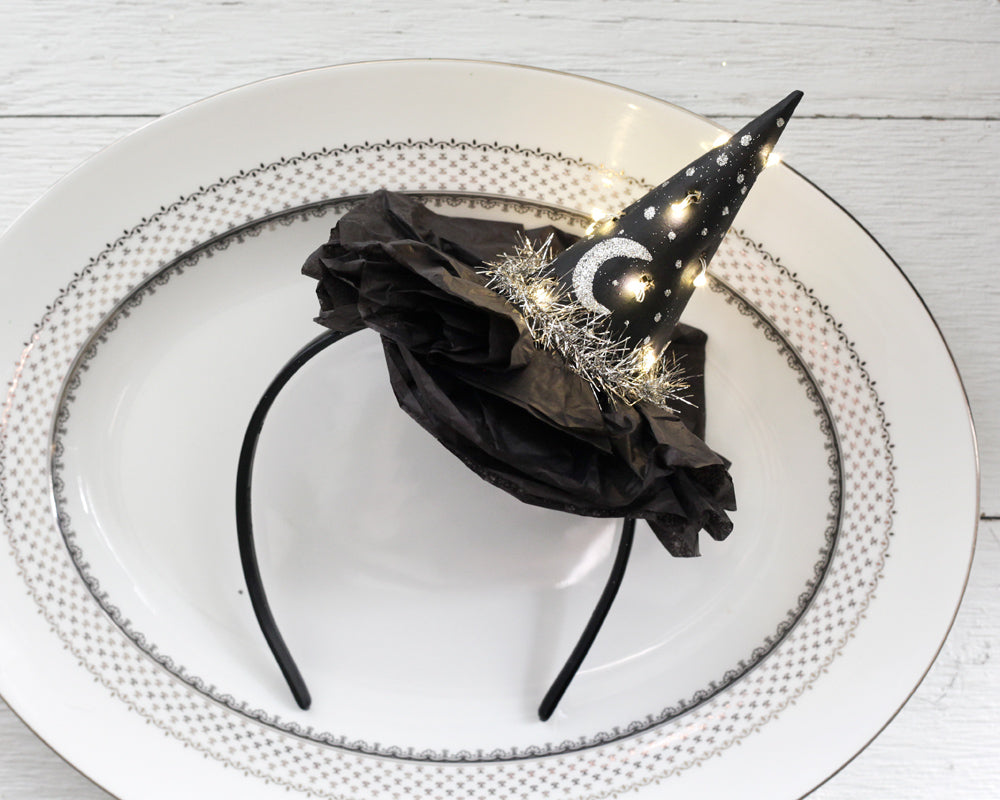 This is a variation on the Easy Witch Hat Headband I did a couple years ago. It's my go-to for a simple Halloween party costume. This year, I decided to add some lights, and make it sparkle like the night sky! These tiny LED lights are everywhere now- the drugstore, craft stores, Amazon, etc. You want to get a short set with the small coin battery pack, so you can tuck it up inside the hat. Inserting all of the lights is a bit fidgety, but once you get the ones in the top of the hat threaded into place, the rest are pretty easy.
As affiliates we earn from qualifying purchases.
Supplies:
- 4 Inch Paper Mache Cone
- black craft paint, paint brush
- awl
- glue
- floral wire
- silver glitter
- Tiny coin battery operated LED 12 light set
- black tissue paper
- scissors
- needle & thread
- headband
- hot glue, glue sticks
- silver tinsel
Step 1:
Paint the outside of the cone black, and let dry.
Step 2:
Use an awl or other sharp tool to poke holes in the cone big enough for the LED lights to fit through. Poke one hole for each light.
Step 3:
Start feeding each light through the holes in the cone. Start at the very top of the cone with the end of the light string farthest from the battery pack, and work your way down the cone. For the upper holes, use a piece of floral wire folded in half to aid in threading the light cord through. Fold the light cord over so that it stays outside the hole. Do not crease the light cord too severely, or it may break.
Once all of the lights are in place, coil up the remaining cord, and push the battery pack into the cone with the switch facing down.
Step 4:
Form the ruffled brim: Cut a long, roughly 3 inch wide strip of black tissue paper or crepe paper, 3 layers thick. With a threaded needle, make a long running stitch 1/2 inch in from the edge of the paper. The stitches can be wide, and do not need to be tidy. Once the whole edge has a stitch running through, remove the needle, and pull the ends of the thread to gather the paper. Pull them together until the paper forms a ruffled circle. Leave an opening about 1 inch in diameter, so that you'll be able to access the light switch. Tie the ends of the thread together, and flatten the ruffled circle.
Step 5:
Hot glue the base of the cone to the hat brim.
Step 6:
Use a paint brush dipped in glue to make a moon and polka dotted star pattern with glue. Sprinkle silver glitter over the design, and shake off the excess. Let dry.
Step 7:
Hot glue a band of silver tinsel around the base of the cone.
Step 8:
Hot glue the hat to the side of the headband, and offset it to the front slightly so that you can still reach in and access the light switch.
Step 9:
Party!
Products featured in this tutorial:


